- Easy
- 20–30 minutes
- No glue
- about 3.5 × 3.9 in (9.0 × 9.9 cm)
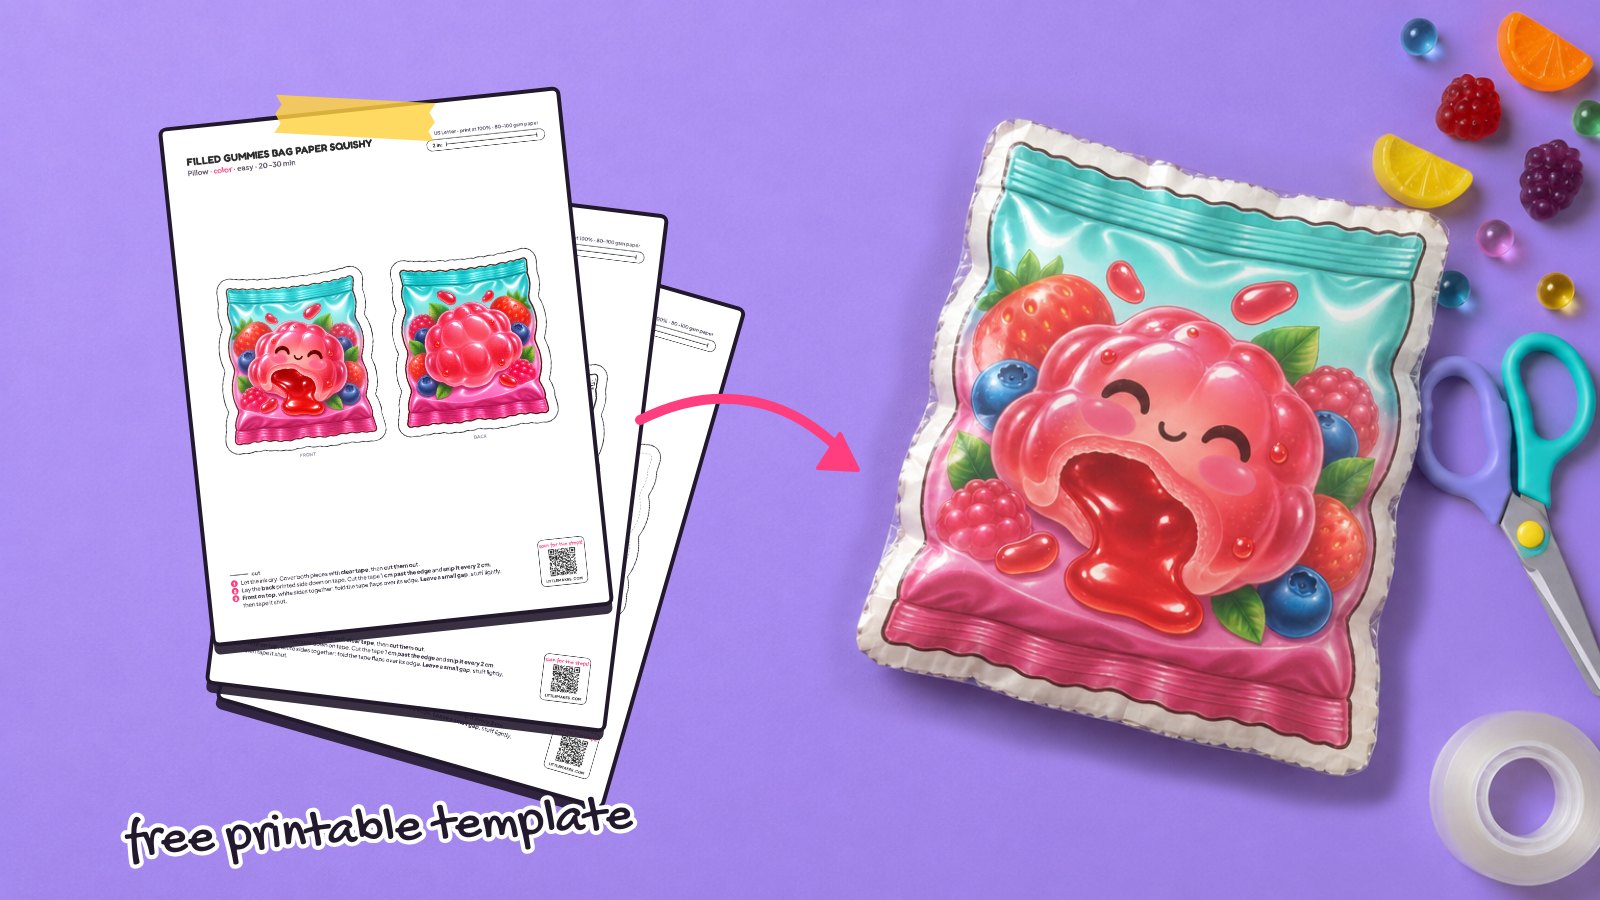
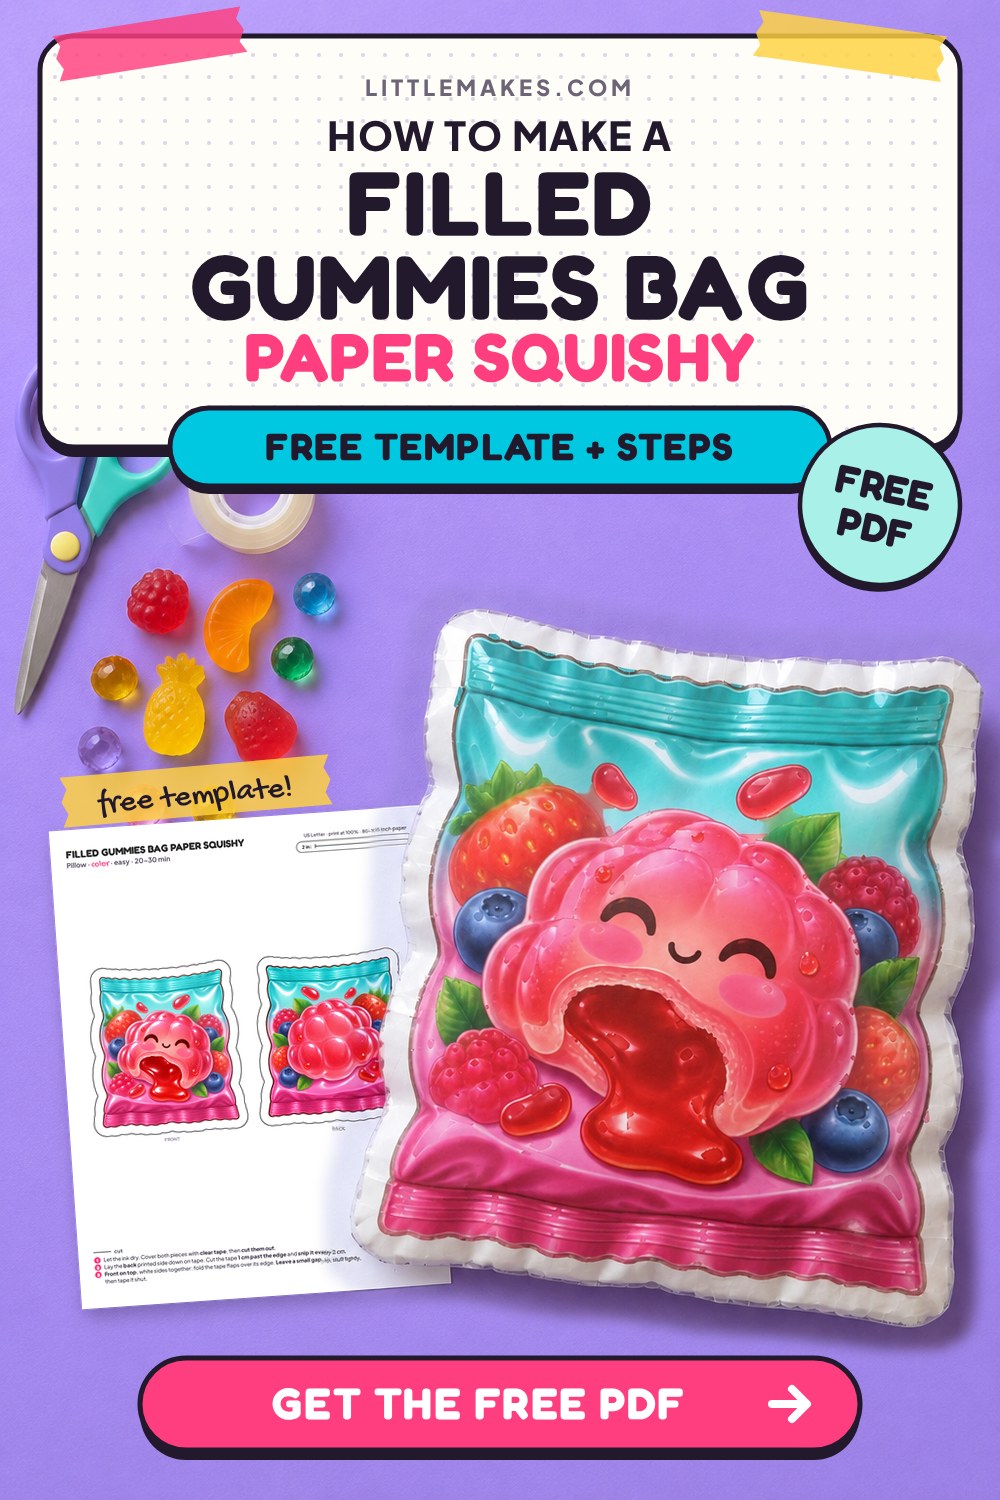
This filled gummies bag looks good enough to eat, featuring a shiny turquoise-and-pink candy pouch with a smiling berry treat oozing glossy red jelly among fresh strawberries, raspberries, and blueberries. Grab our free printable gummy bites paper squishy template in US Letter or A4, which comes in 3 versions: full color, a coloring page, and a blank outline. Pair it with our gummy clusters paper squishy for the ultimate sweet stash!
What you need
How to make it, step by step
1Print the template
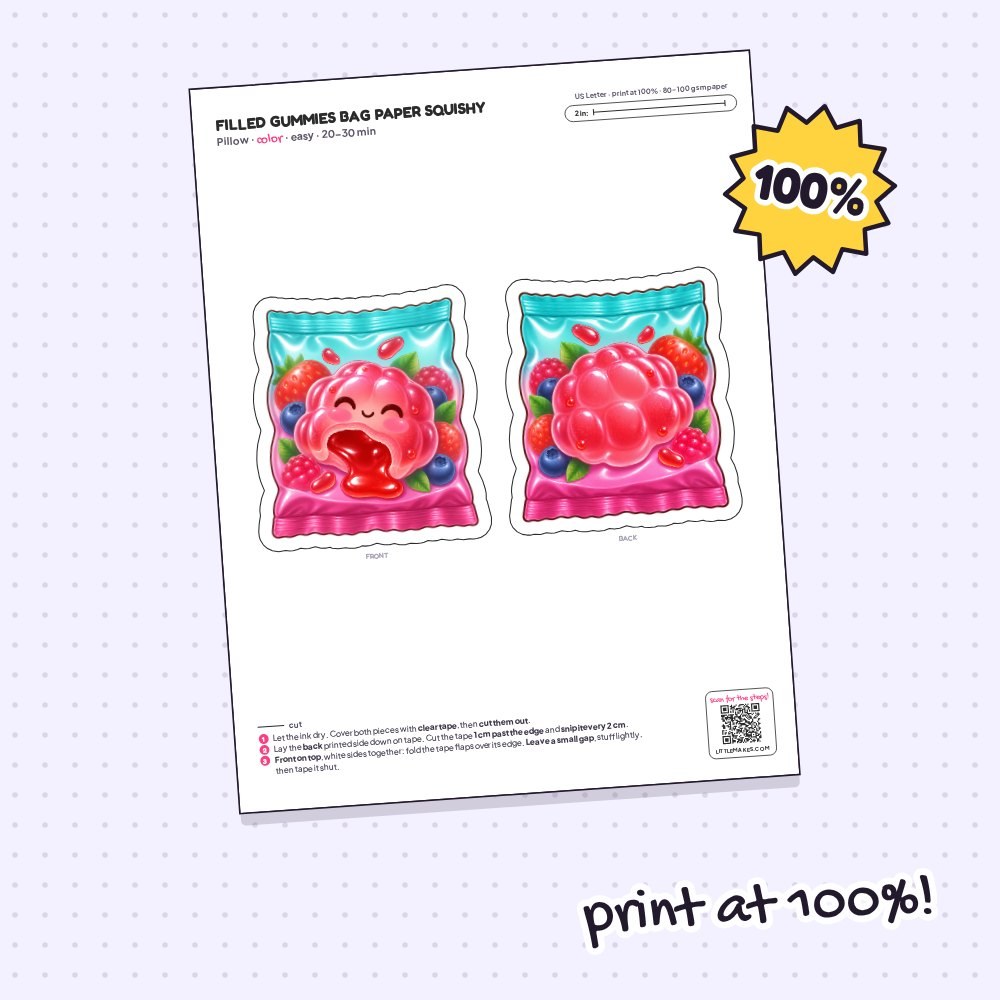
Print your filled gummies bag template at 100% scale on plain printer paper (make sure “fit to page” is turned off). Check the test line in the top corner—it should measure exactly 2 inches (50 mm on A4). If you picked the coloring page version, color the berry candy, red jelly filling, and fruit details now, then let any marker ink dry completely.
2Tape the pieces
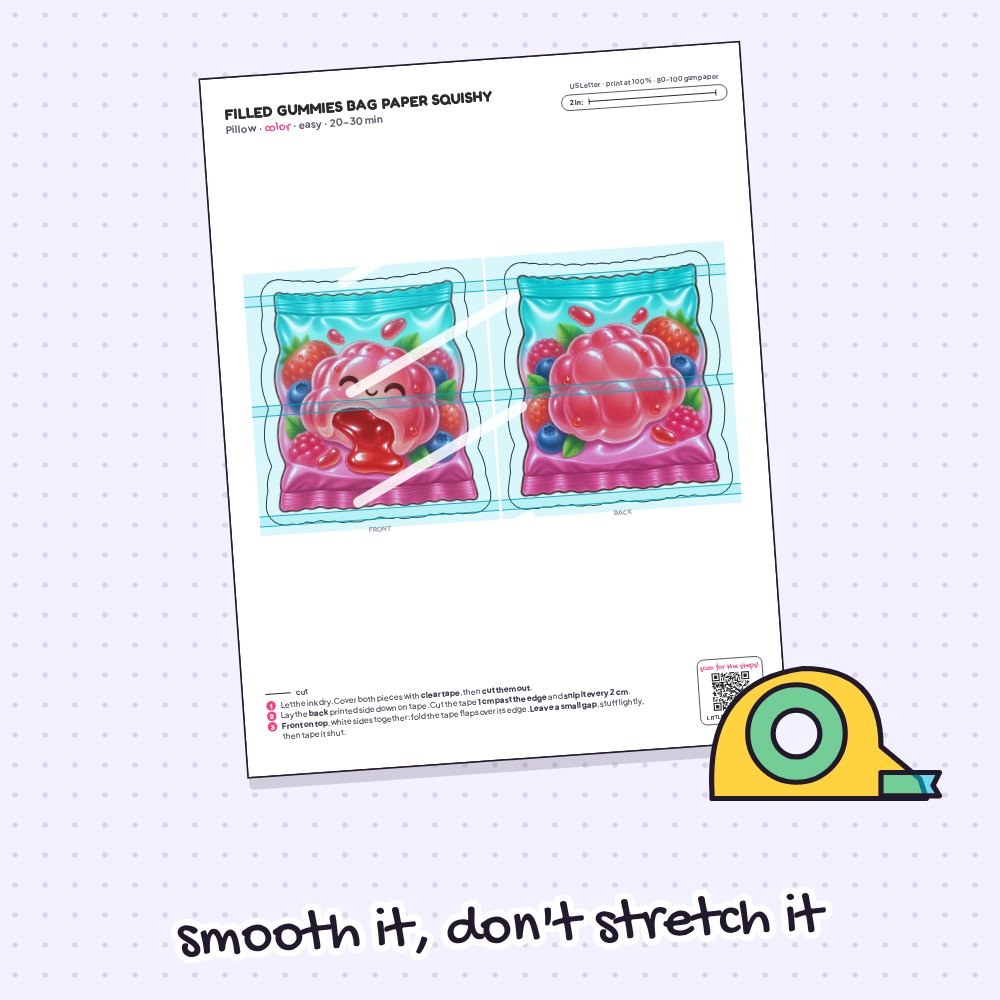
Lay strips of wide clear packing tape over the two bag pieces only, rather than taping the entire sheet. Smooth each strip from the center of the berry pouch outward without pulling or stretching the tape, because stretched tape will wrinkle later. This layer makes your candy bag shiny, strong, and extra squishy.
3Cut out both pieces
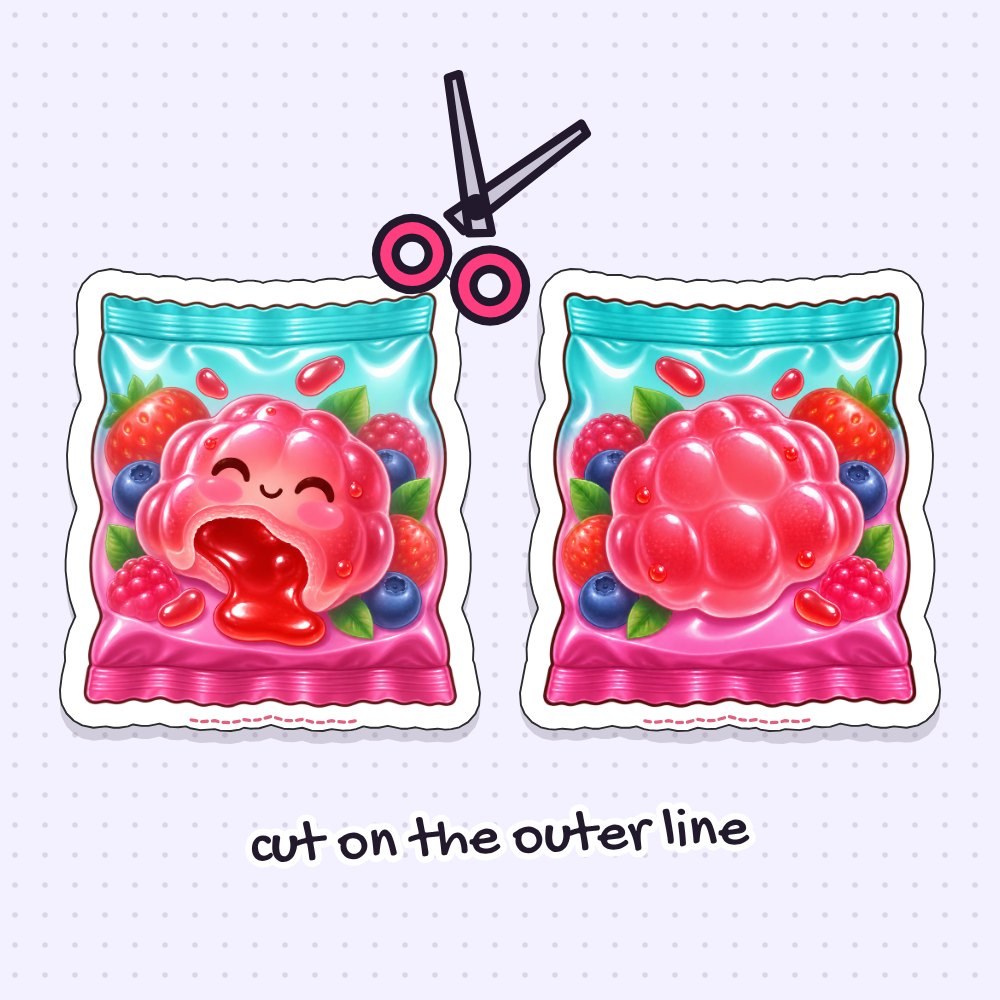
Cut out both the front and the back along the solid black outer line. Take your time following the wavy top and bottom edges and the curved sides of the pouch, making sure to keep the small white border intact all the way around.
4Add a tape border to the back
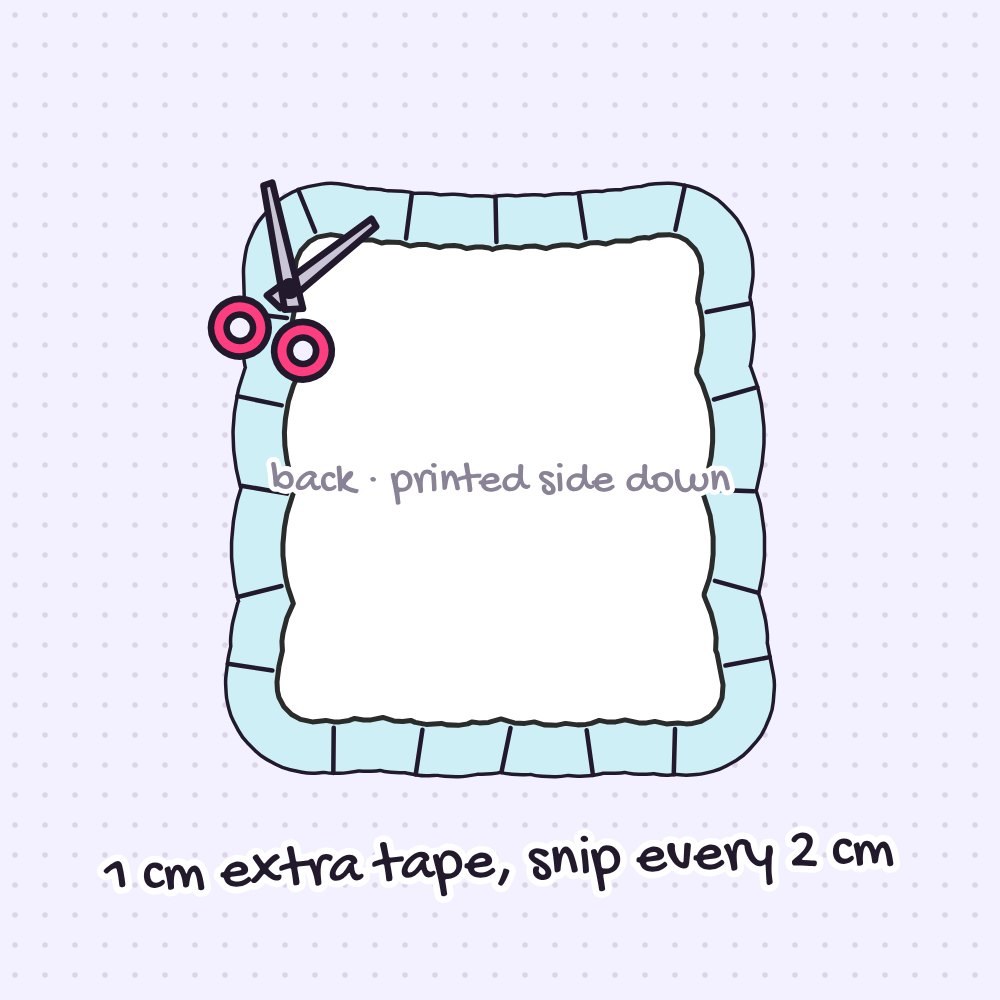
Place the back piece printed side down onto strips of clear tape so the sticky side faces up. Cut the tape about 1 cm (½ inch) past the paper edge, then snip into this tape border every 2 cm (1 inch) right up to the paper. These little sticky flaps will hold your squishy together around the bag’s curves.
5Join front and back
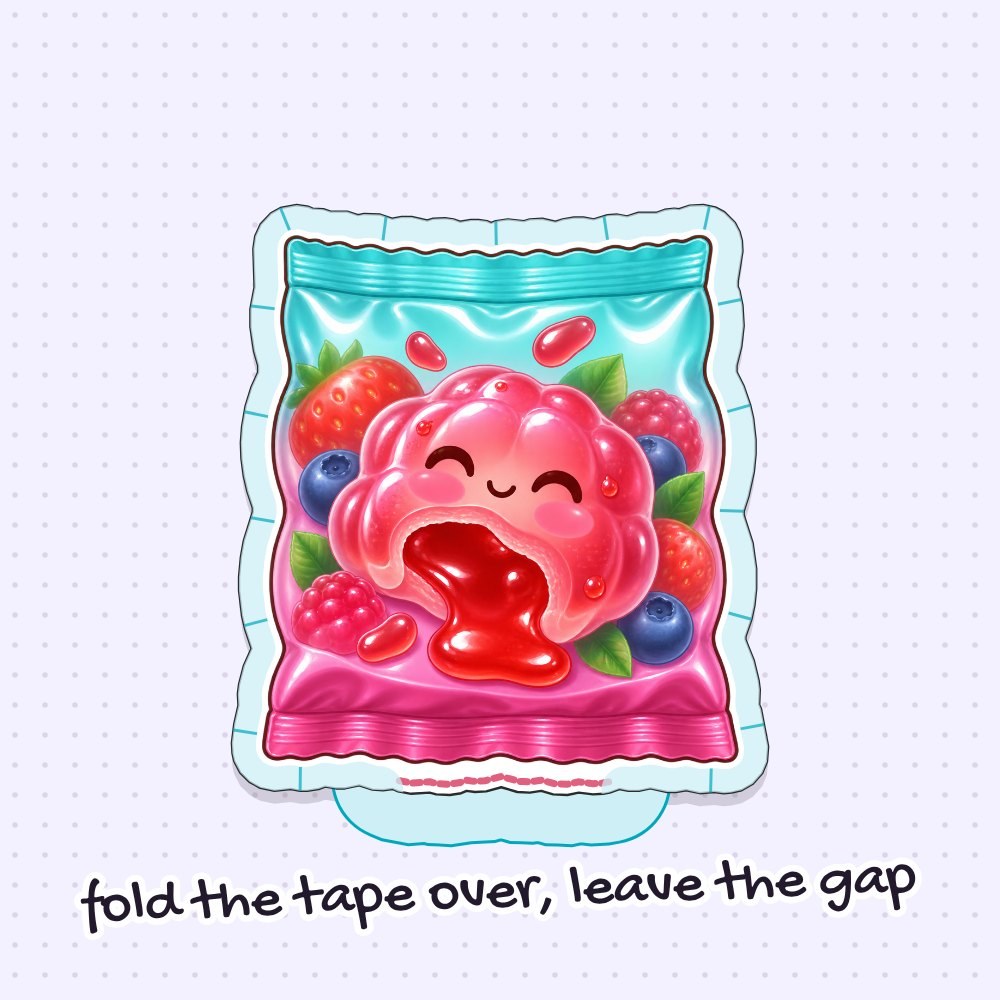
Set the front piece on top of the back piece with the white sides together, lining up the bag corners. Fold the sticky tape flaps over the front edge one by one and press them down firmly. Leave a 3.5 cm (1½ inch) gap open on one side—just like the pink line in the picture shows—so you can stuff your squishy.
6Stuff it
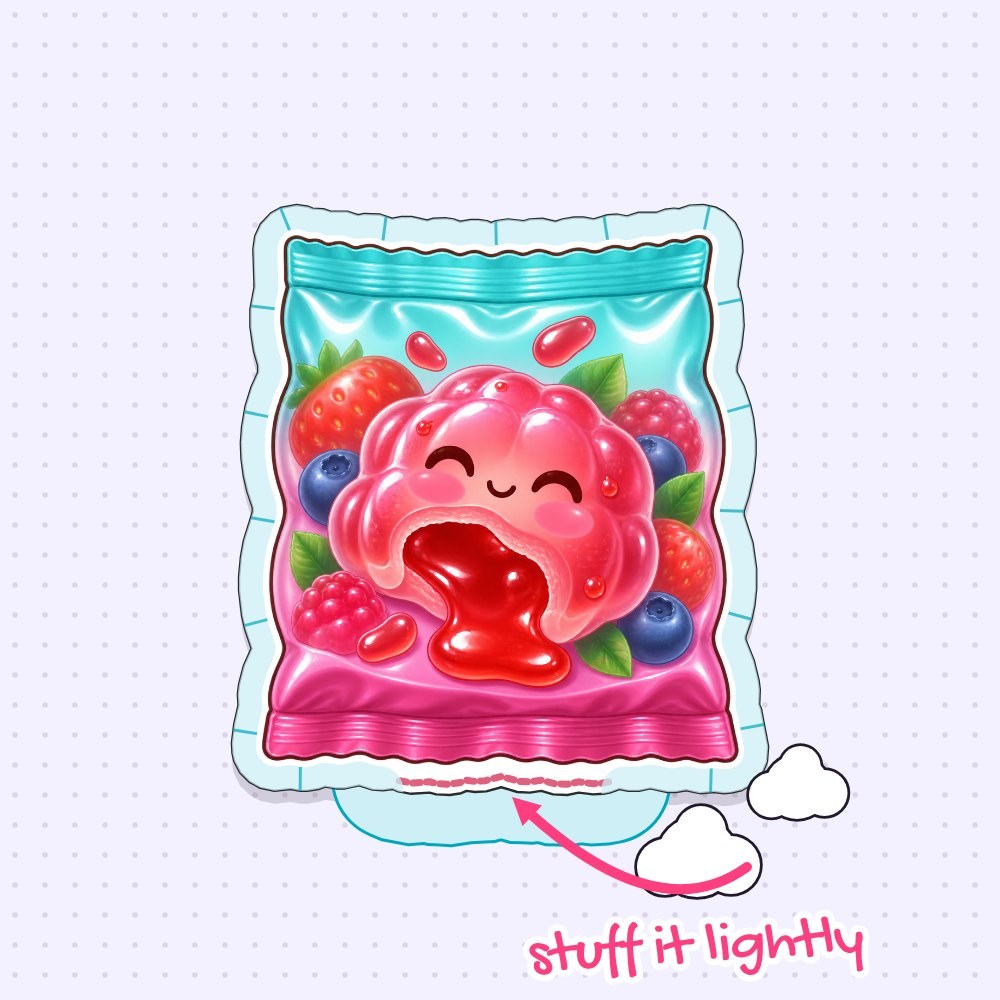
Tear your plastic bags, cotton, or fiberfill into small pieces and push them inside through the open gap. Pack the stuffing into the far corners of the candy pouch first, then fill the middle until the berry bag feels soft and puffy. Stop before it gets too tight, or the taped seams might pop open.
7Close the gap
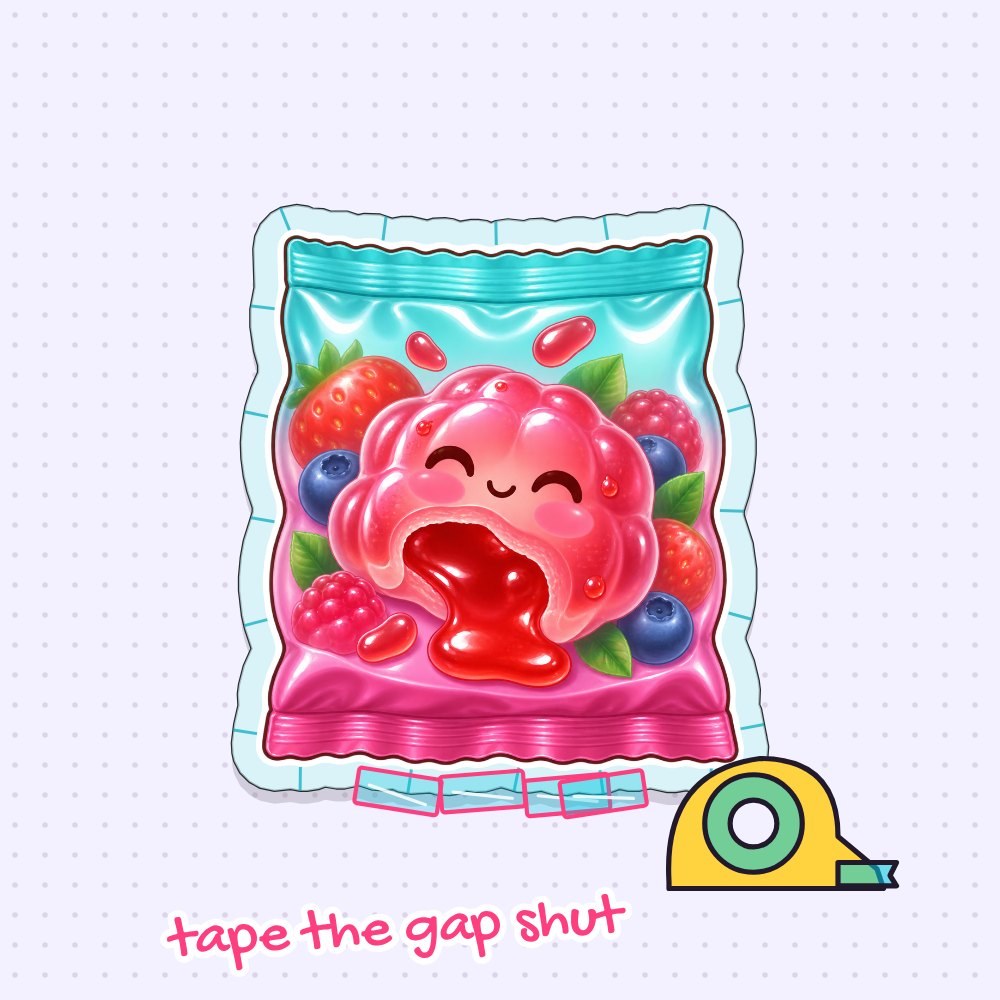
Fold the last tape flaps over the opening to close up the side of the bag, then tape the gap shut with an extra strip of clear tape. Run your finger firmly along all the wavy top, bottom, and side edges to press the tape down well.
8Squish!
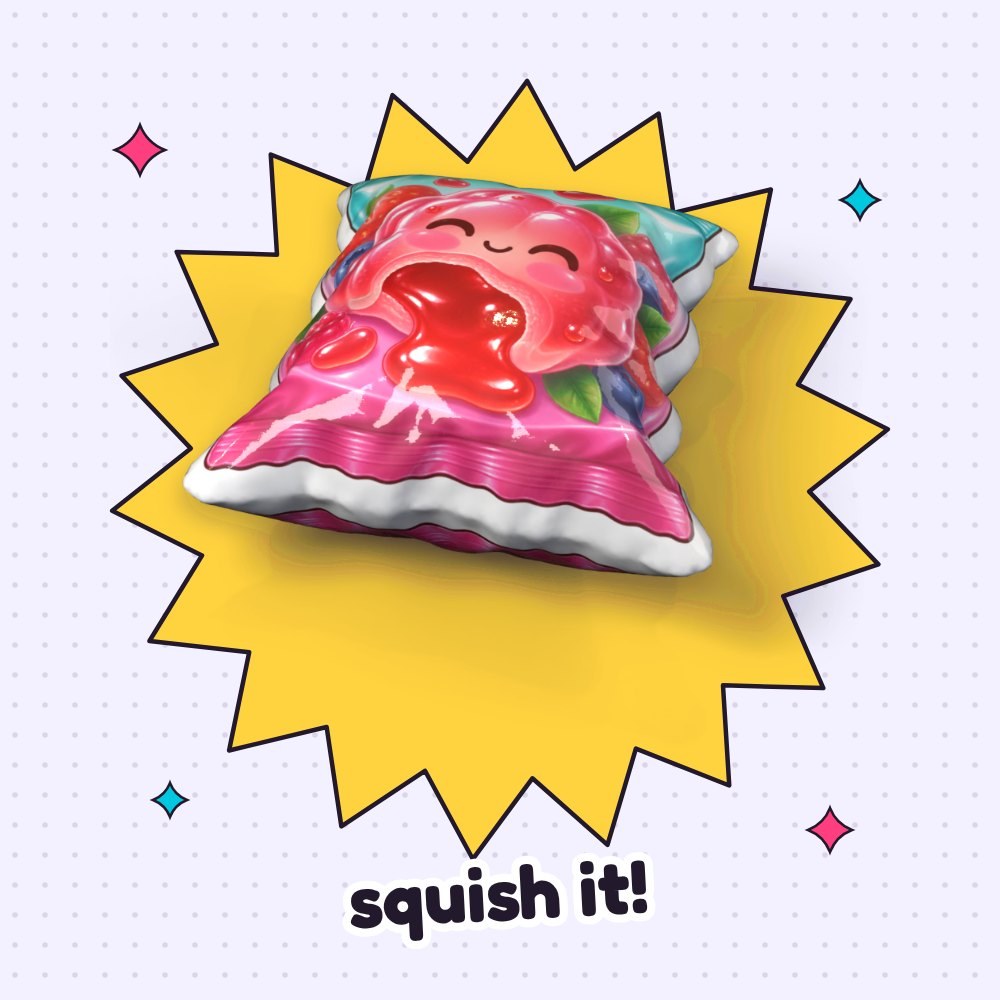
Done! Give the plump berry pouch a squeeze and watch your filled gummies bag paper squishy puff right back up. Want a slow-rising squishy? Gently prick one tiny pinhole into the back of the bag.
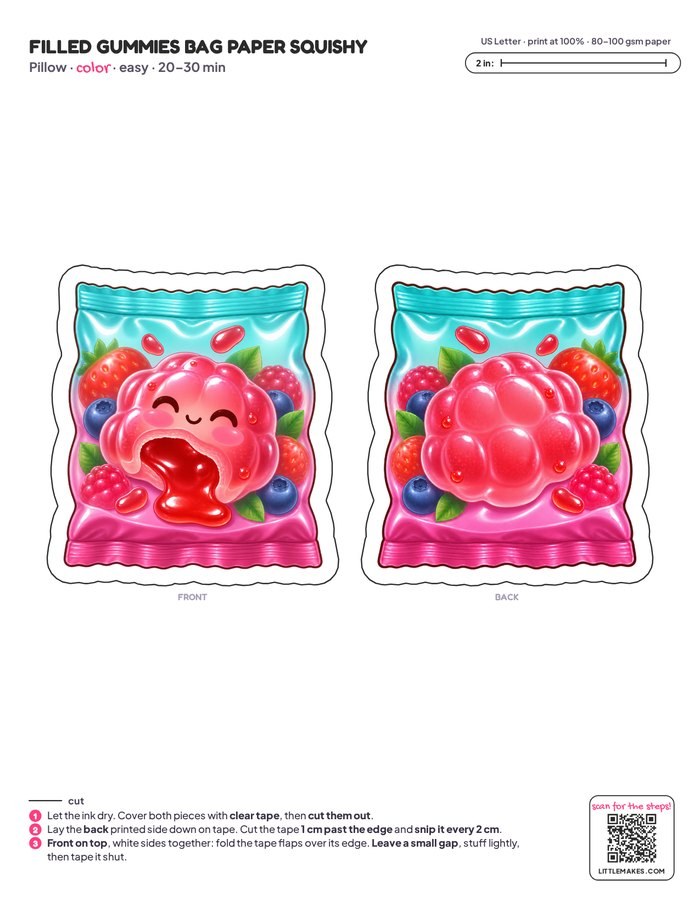
Free Filled Gummies Bag Squishy Template
- Color
- Coloring page
- Blank, design your own
- Step-by-step guide
One free PDF: the template in three versions (pages 1–3) and the step-by-step guide (pages 4–5). Print the template at 100% on plain printer paper.
Tips for the perfect squish
- The candy bag feels too hard. If the pouch won’t squish easily, it has too much stuffing inside. Gently open the side gap, take some filling out, and tape the edge shut again.
- Wrinkles across the glossy berry. Tape wrinkles happen when the strip is pulled tight as you lay it down. Use shorter strips of packing tape and lay them on over the artwork without pulling.
- A corner seam splits open. The corners of the pouch take the most pressure when you squeeze. Place a new short strip of clear tape right across the split edge, overlapping the old ones.
- Smudged red and pink markers. Bright berry marker colors need a moment to set on plain paper before you apply tape. Let your markers dry fully before taping; regular printer ink is fine right away.
Questions
Can I use glue instead of tape for a gummy bites paper squishy?
Not for the edges. Glue doesn’t stick to tape-covered paper, so the seams would open when you squeeze. The snipped clear tape border folded over the edge holds best.
What paper works best for a paper squishy template?
Plain printer paper (80–100 gsm / 20–24 lb) is the best choice. Cardstock makes the squishy stiff and it won’t squish as nicely.
What can I stuff my filled gummies bag with?
Plastic grocery bags give a crinkly and light candy wrapper feel, while cotton balls or fiberfill make it super soft. You can also use small pieces of memory foam for a slow-rising squishy.
Can I make this candy bag squishy bigger or part of a set?
Yes! Print the page at a larger scale, for example 120%, making sure to print the front and the back together on the same sheet so they match. You can also print our gummy candy bag squishy at 100% to build a matching sweet collection.
Can I make these with a class or a party group?
Yes! Print one sheet per person and cut the tape strips in advance. Kids can color the coloring page while you help with taping, and you can plan about 30 minutes for the craft.
More paper squishies to make
Pin this tutorial
Save it to your craft board so you can find the free template again.