
- Medium
- 30–45 minutes
- 3D shape
- about 2.3 × 3.1 in (5.9 × 8.0 cm)
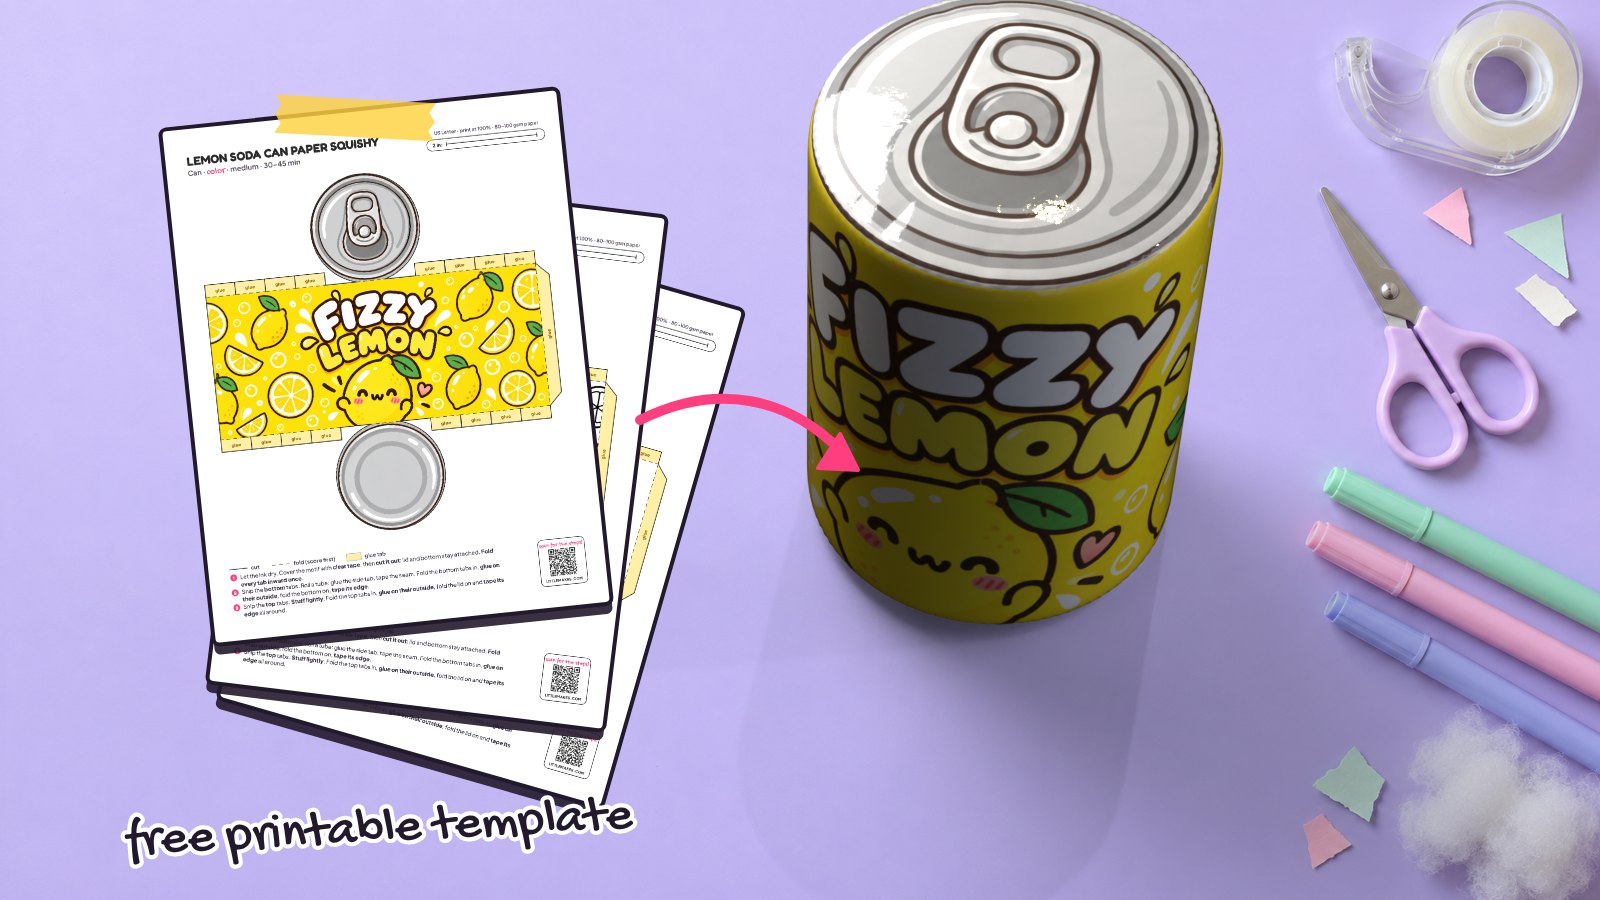
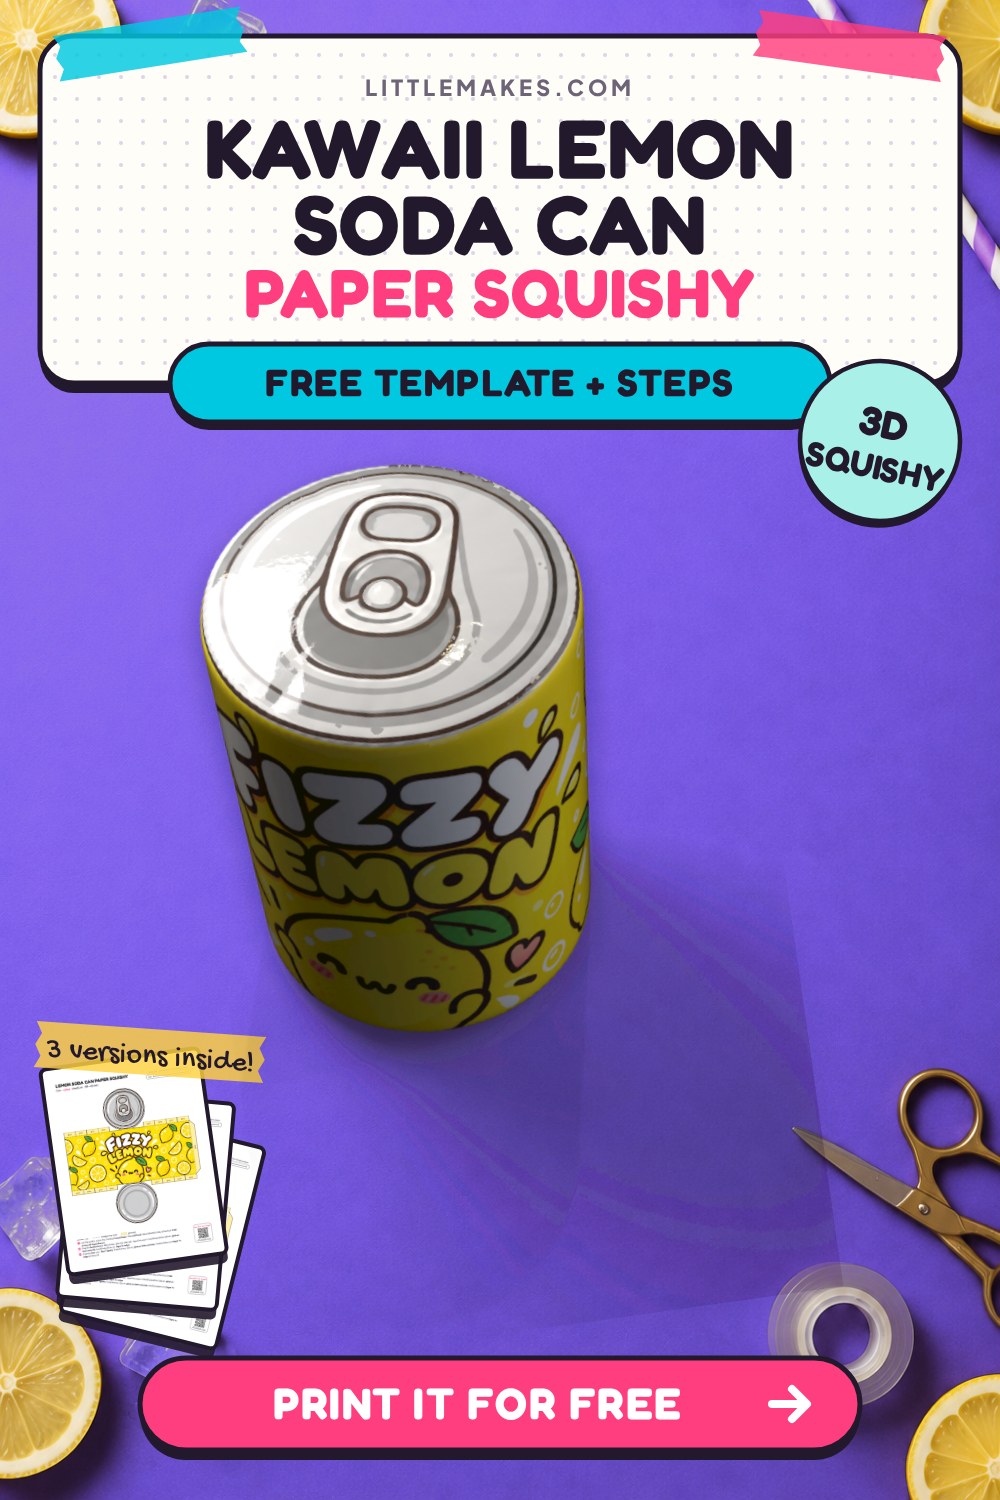
Add a splash of citrus to your craft desk with this bright yellow Fizzy Lemon can! It features a blushing kawaii lemon character, floating citrus slices, and a silver pull-tab lid that looks just like a real beverage. When you download our free soda paper squishy template, you get 3 printable versions in both US Letter and A4 sizes: full color, a coloring page, and a blank design. Pair it with our energy drink squishy to start your own mini vending machine.
What you need
How to make it, step by step
1Print the template
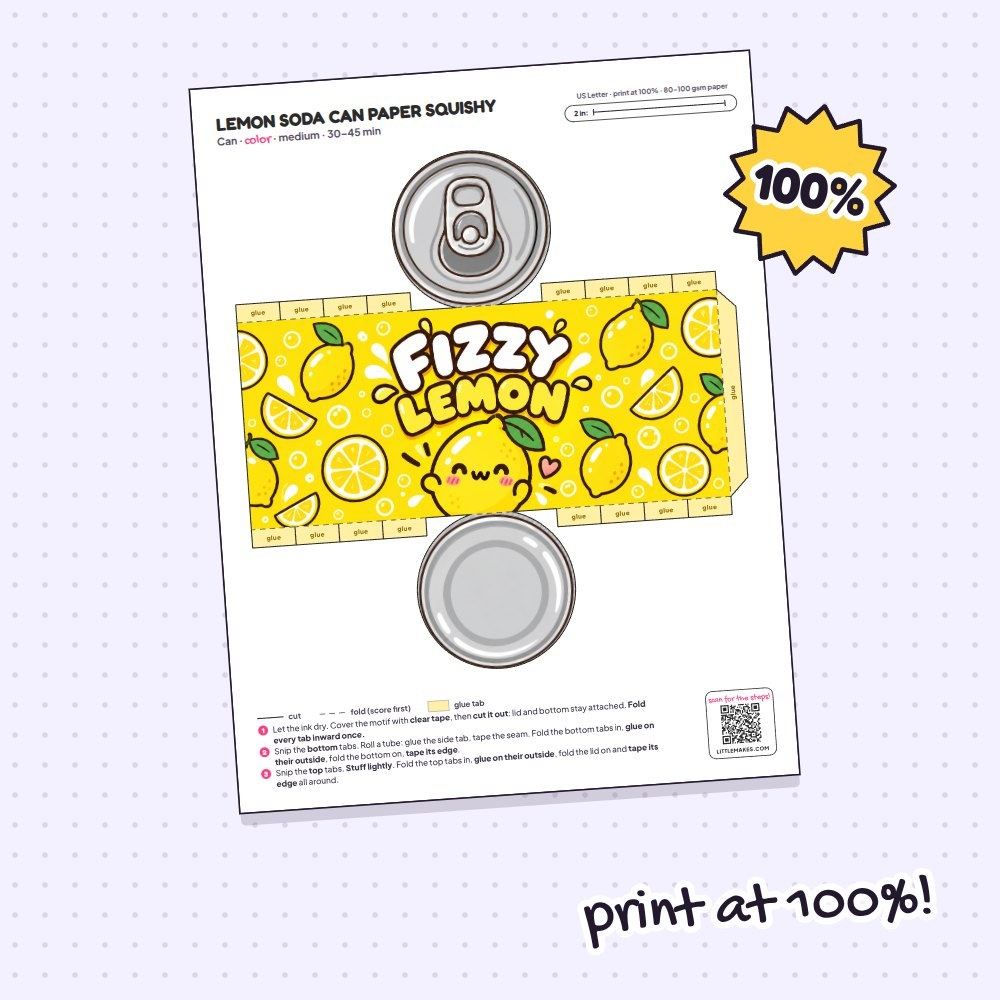
Print your lemon soda can sheet at 100% scale on plain printer paper, making sure to turn off the “fit to page” option. Check the scale bar in the top corner so it measures exactly 2 inches (or 50 mm on A4). If you picked the coloring page version, grab your markers and color the fizzy lemon wrapper and silver lids right now before adding any tape.
2Tape the motif
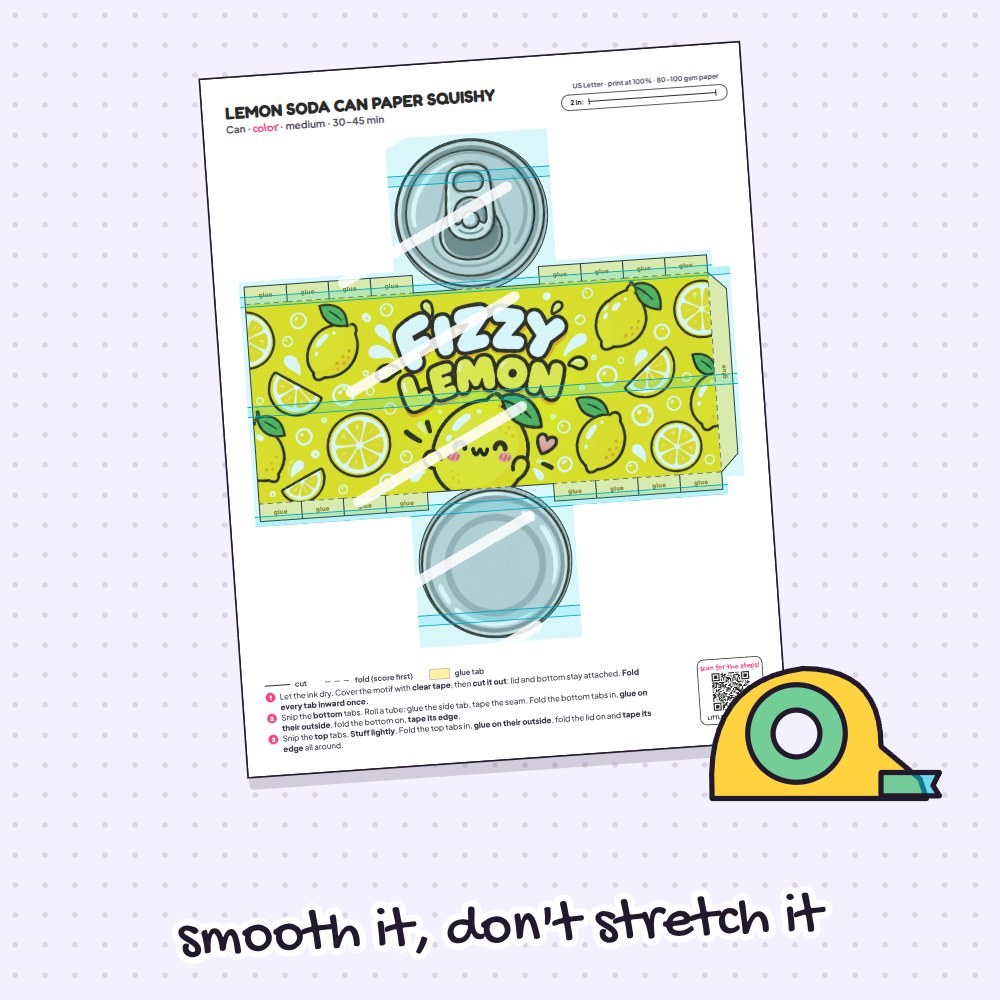
Lay strips of wide clear packing tape across the entire printed motif, making sure to cover the yellow wrapper, both round silver lids, and all the outer glue tabs. Smooth each strip down starting from the center and working outward so no air bubbles get trapped over the cute lemon face. Never stretch the tape while laying it down, or the paper will curl.
3Cut it out
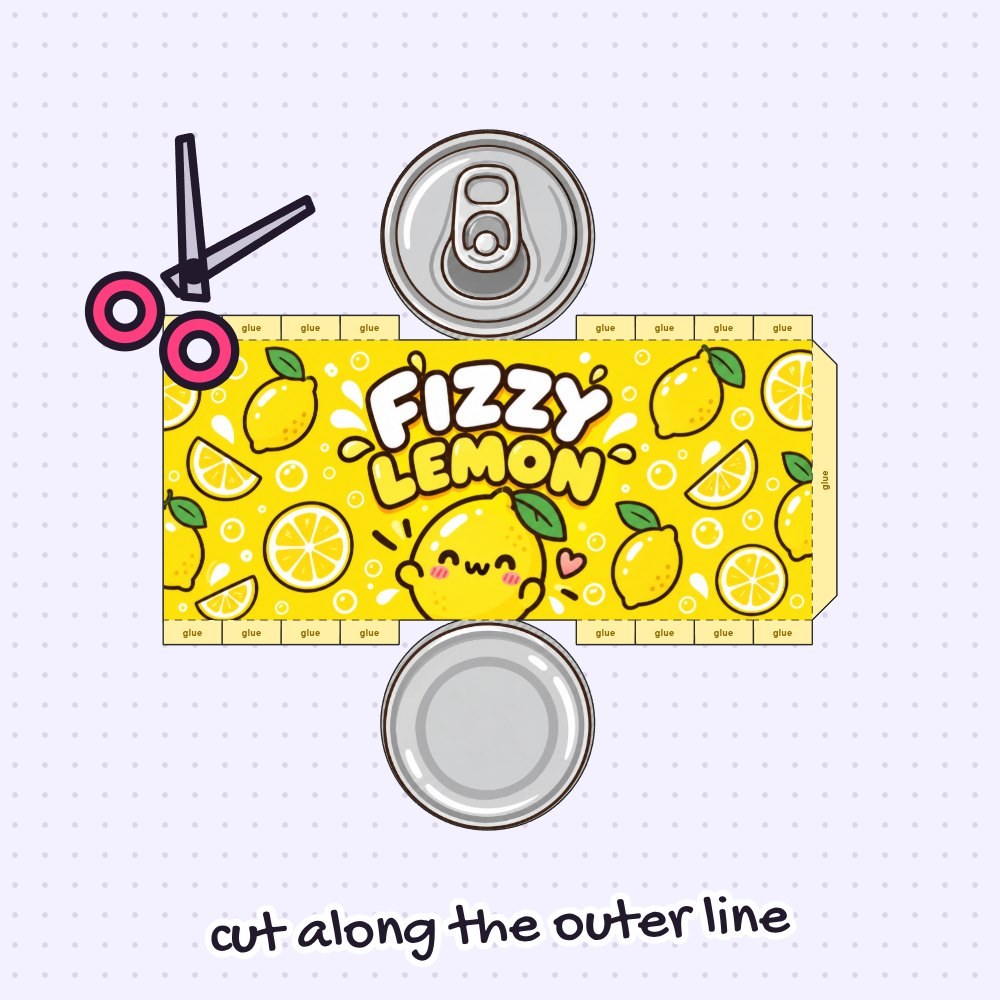
Use your scissors to cut neatly along the solid black outer outline of the template. Take your time curving around the top silver pull-tab lid and the bottom base circle so they stay smoothly attached to the main yellow wrapper at their narrow hinges. Do not cut any of the dashed lines, as those are your fold guides.
4Pre-fold every tab
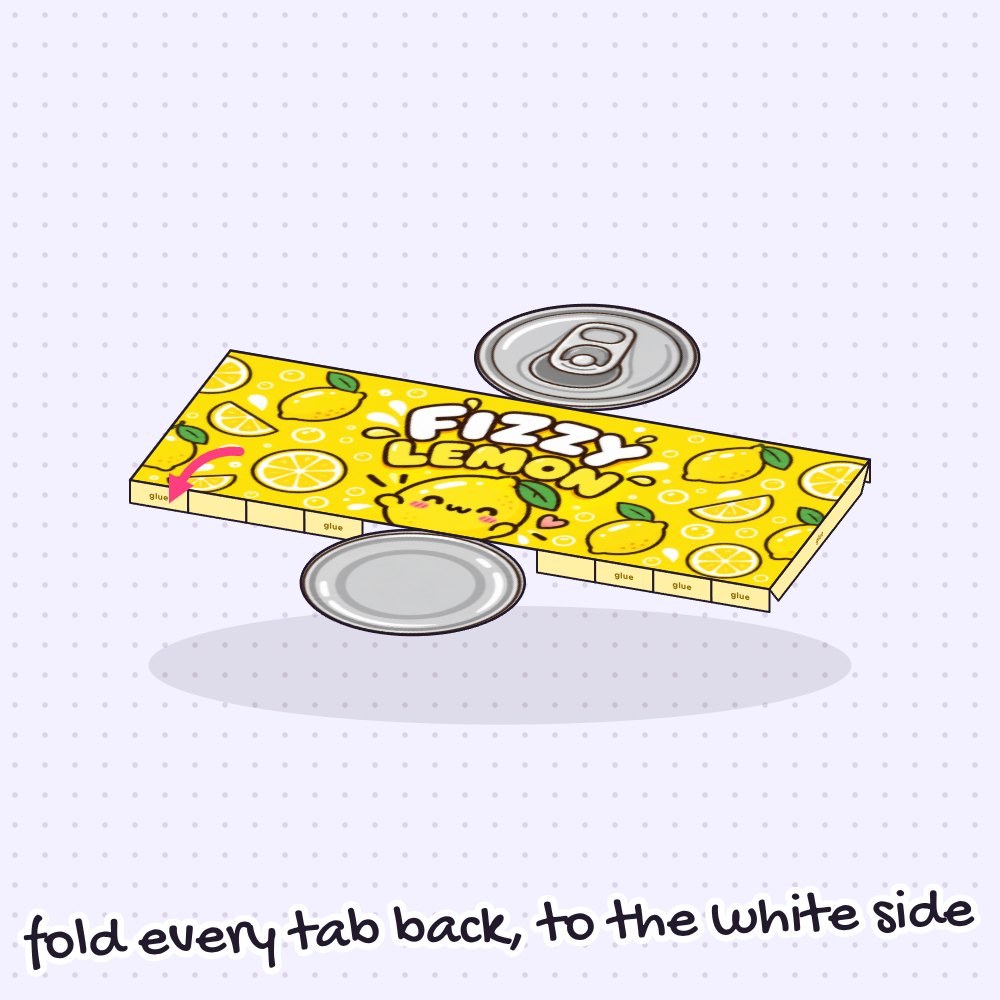
Run an empty pen along a ruler over all the dashed lines to score them, including the straight side tab, the rows of small tabs, and both narrow hinges where the round lids meet the yellow body. Fold every single tab and both circle hinges inward toward the blank white side of the paper once to create a crisp crease, then unfold them.
5Snip the bottom tabs
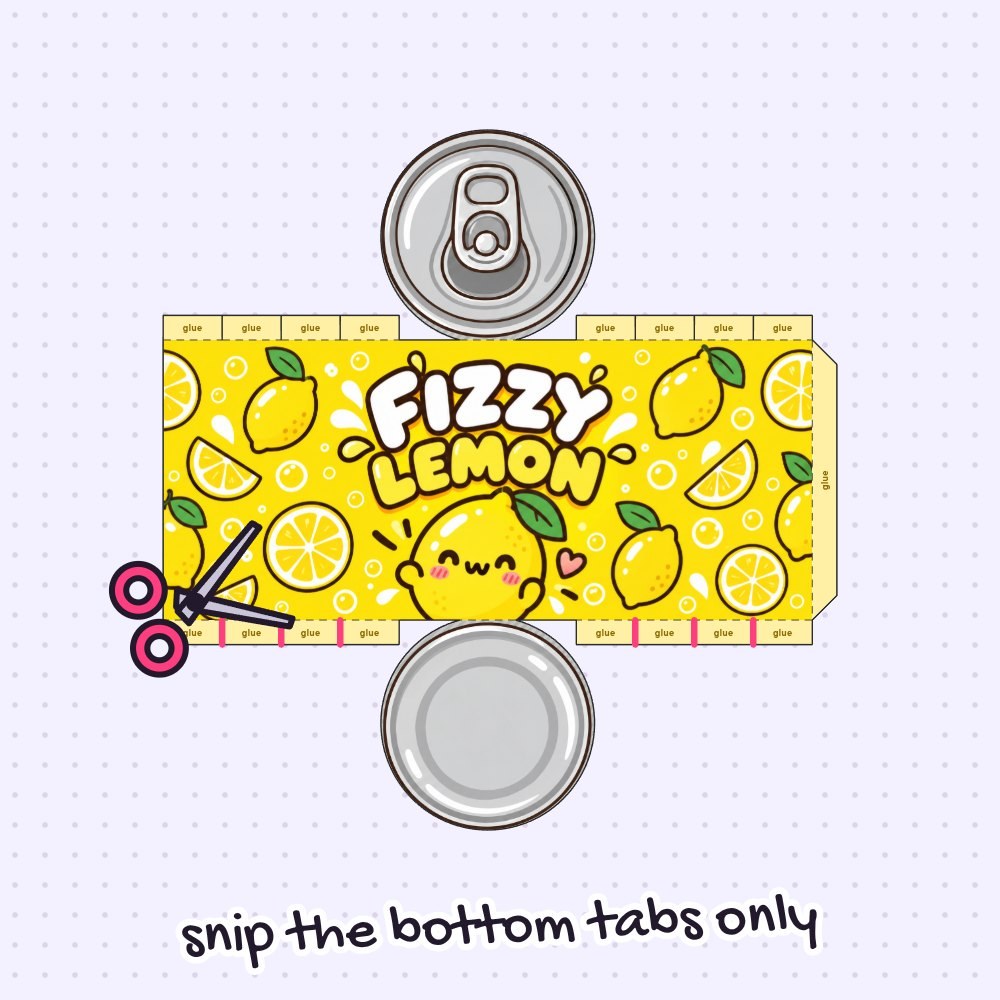
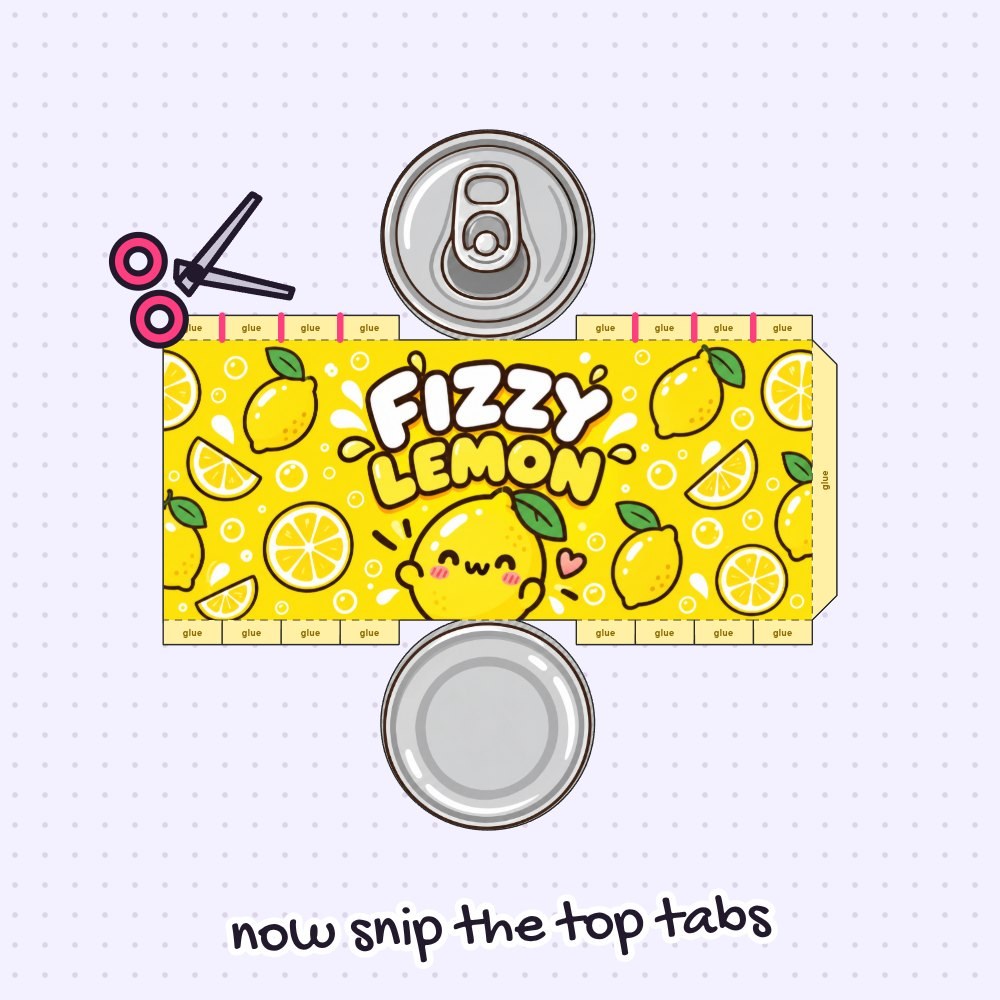
Look at the bottom edge of the yellow lemon wrapper and use the tips of your scissors to snip only the short solid lines between the small rectangular bottom tabs. Cut right up to the scored dashed fold line, stopping before you slice into the main illustration. Leave the top row of tabs near the pull-tab lid uncut for now.
6Roll the wrapper
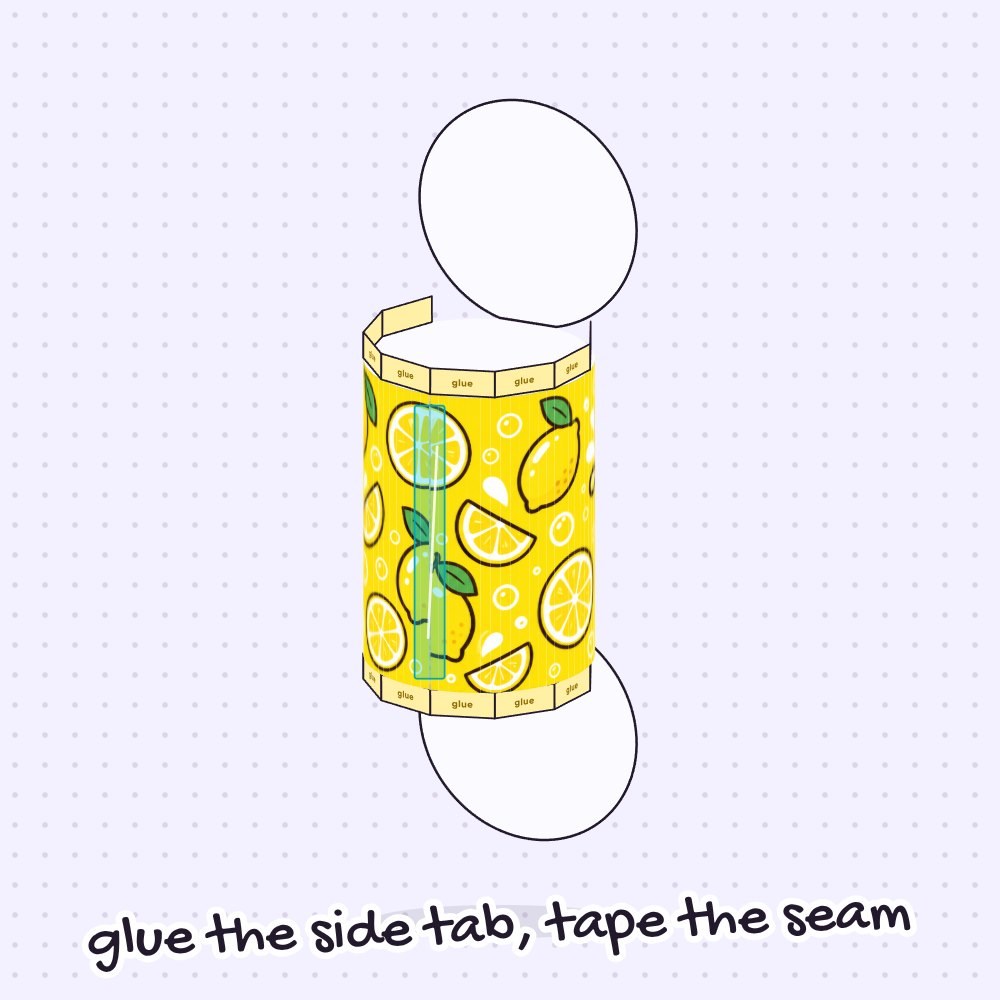
Roll the main yellow wrapper into a tube with the Fizzy Lemon artwork facing outside. Put a bit of glue on the long yellow side tab, tuck it inside the opposite edge of the wrapper to hold the cylinder shape, and press. Immediately run a strip of regular clear tape along the outside of this side seam over its whole length.
7Glue the bottom on
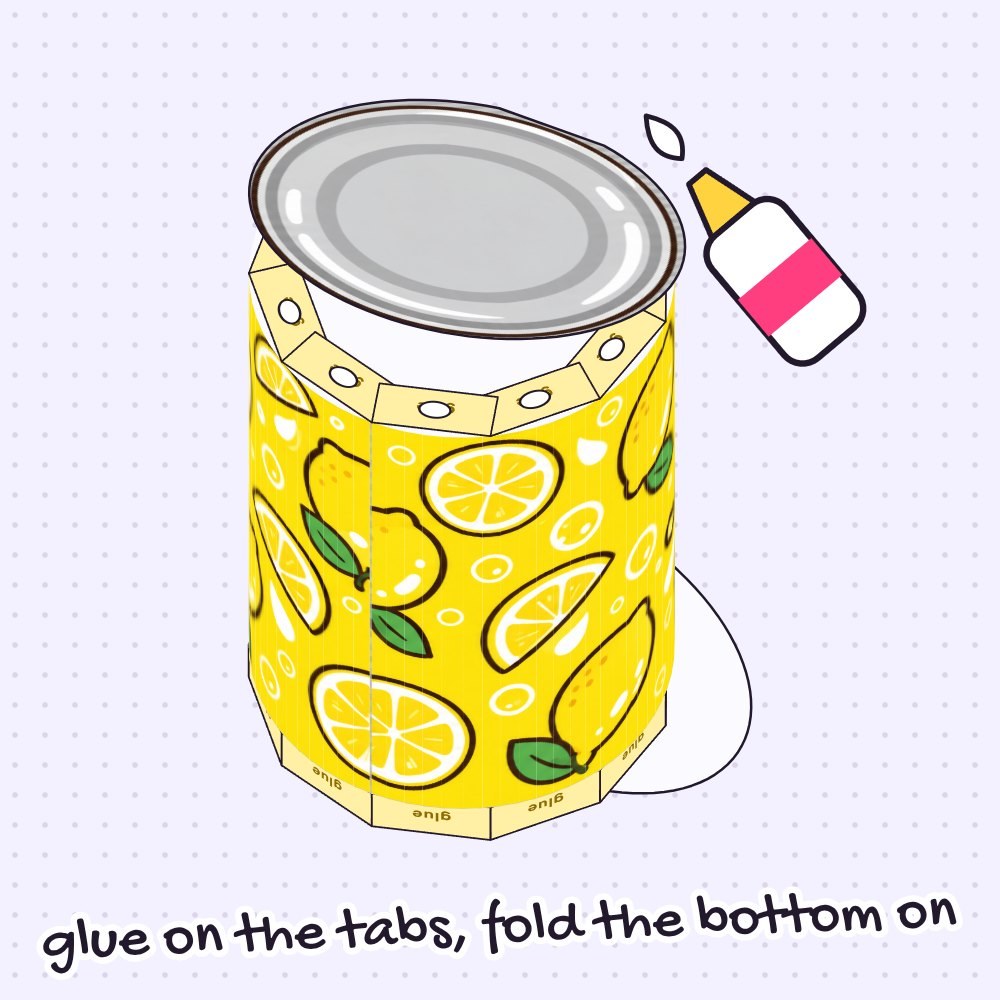
Fold all the snipped bottom tabs inward so they point toward the center of the tube. Dab glue onto their outer yellow sides, which are now facing up at you. Fold the attached silver bottom circle onto those sticky tabs and press it down firmly with your fingers so the base of your soda can sits nice and flat.
8Tape the bottom
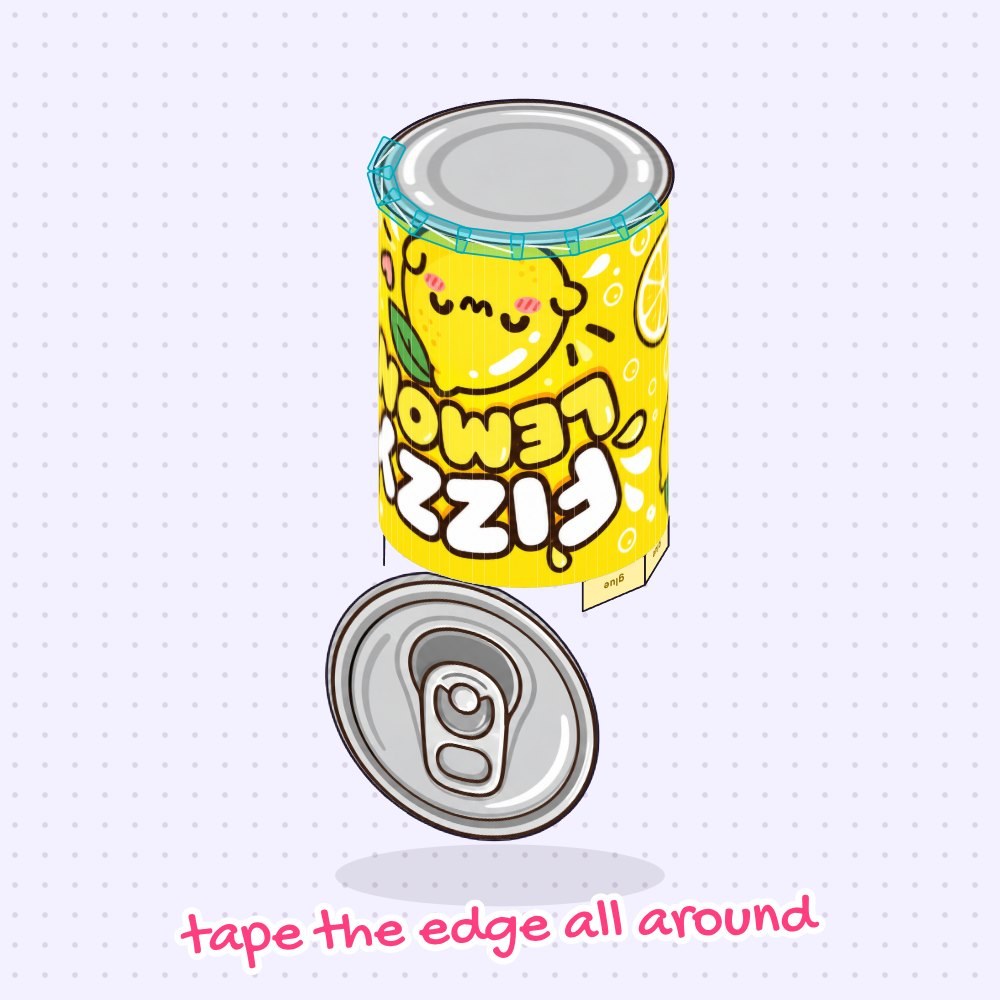
Because craft glue alone does not hold on tape-covered surfaces, you need to lock the base in place with regular clear tape. Wrap overlapping strips of clear tape all the way around the bottom edge, bridging the silver base circle and the yellow lemon wrapper so the curved seam is completely sealed.
9Snip the top tabs
Now that the bottom of the can is sturdy and closed, take your scissors and snip the short solid lines between the small tabs along the top edge of the wrapper. Cut right up to the dashed fold line just like you did on the base, being careful not to snip the hinge that holds the silver pull-tab lid.
10Stuff it
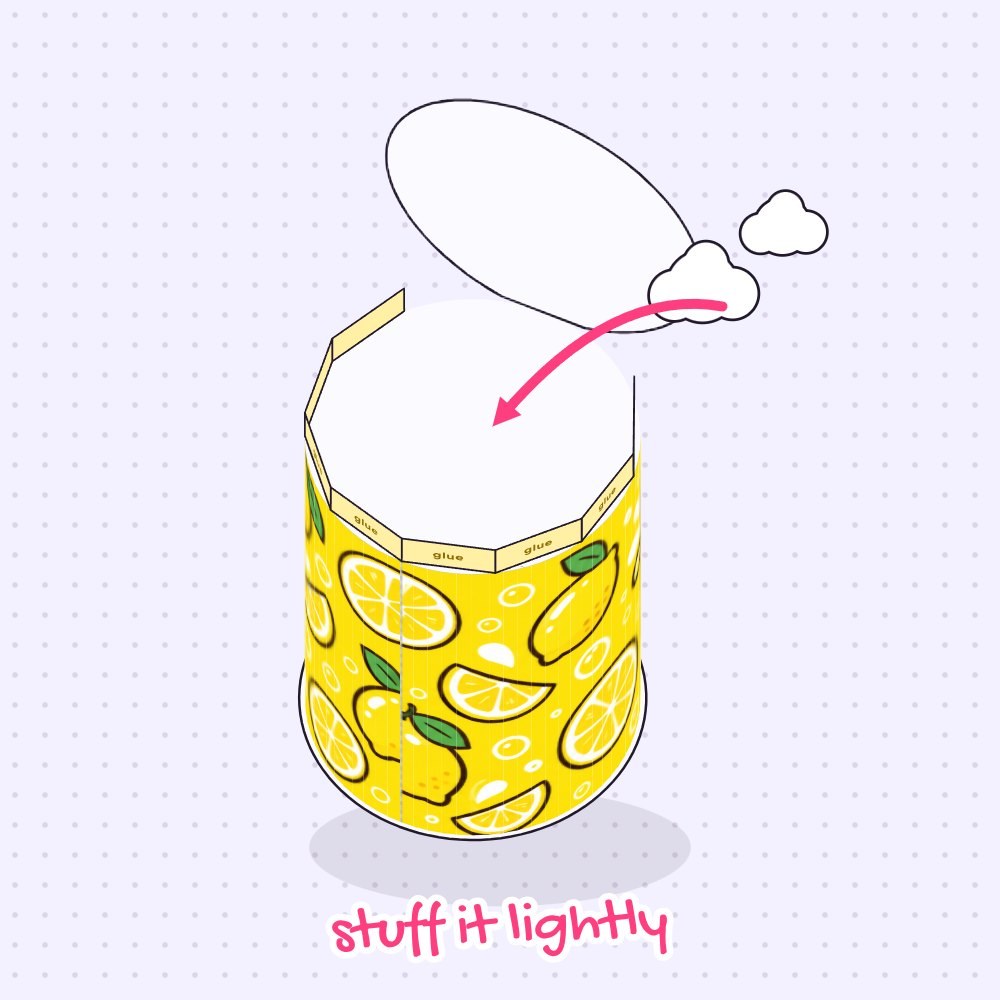
Stand your lemon soda can upright on the table and keep the silver pull-tab lid folded back out of the way. Push small tufts of fiberfill or plastic bag pieces down through the open top. Stuff the cylinder lightly and evenly from the bottom up so the sides curve smoothly without bulging out of shape.
11Glue the lid on
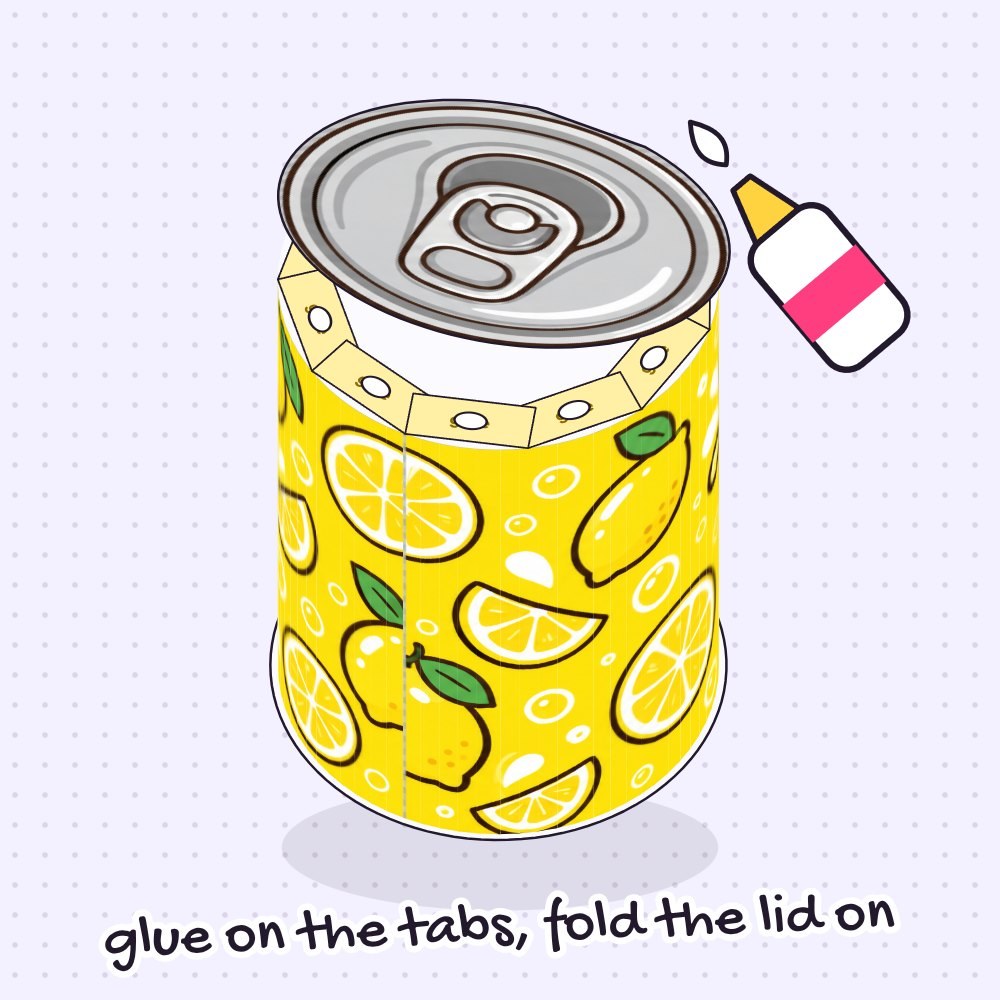
Fold the small top tabs inward over the stuffing so their yellow outer sides face up. Spread glue across the outer sides of those tabs, then fold the silver pull-tab lid down onto them. Press the lid firmly against the tabs for a moment so the top of your soda can closes neatly.
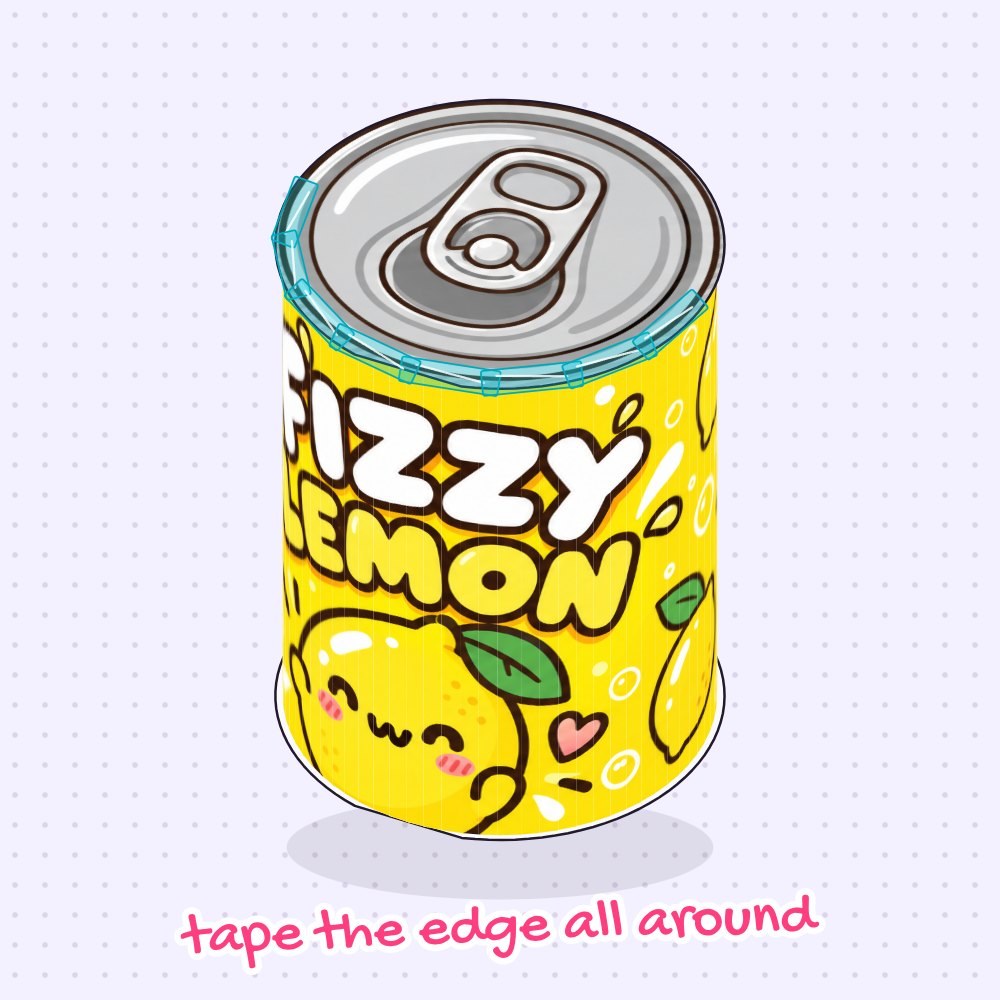
12Tape the lid
Since glue alone never holds on slick packing tape, seal the top edge just like the bottom. Apply overlapping strips of regular clear tape all the way around the lid’s edge, securing the silver pull-tab top to the yellow body so your soda can stays closed for good.
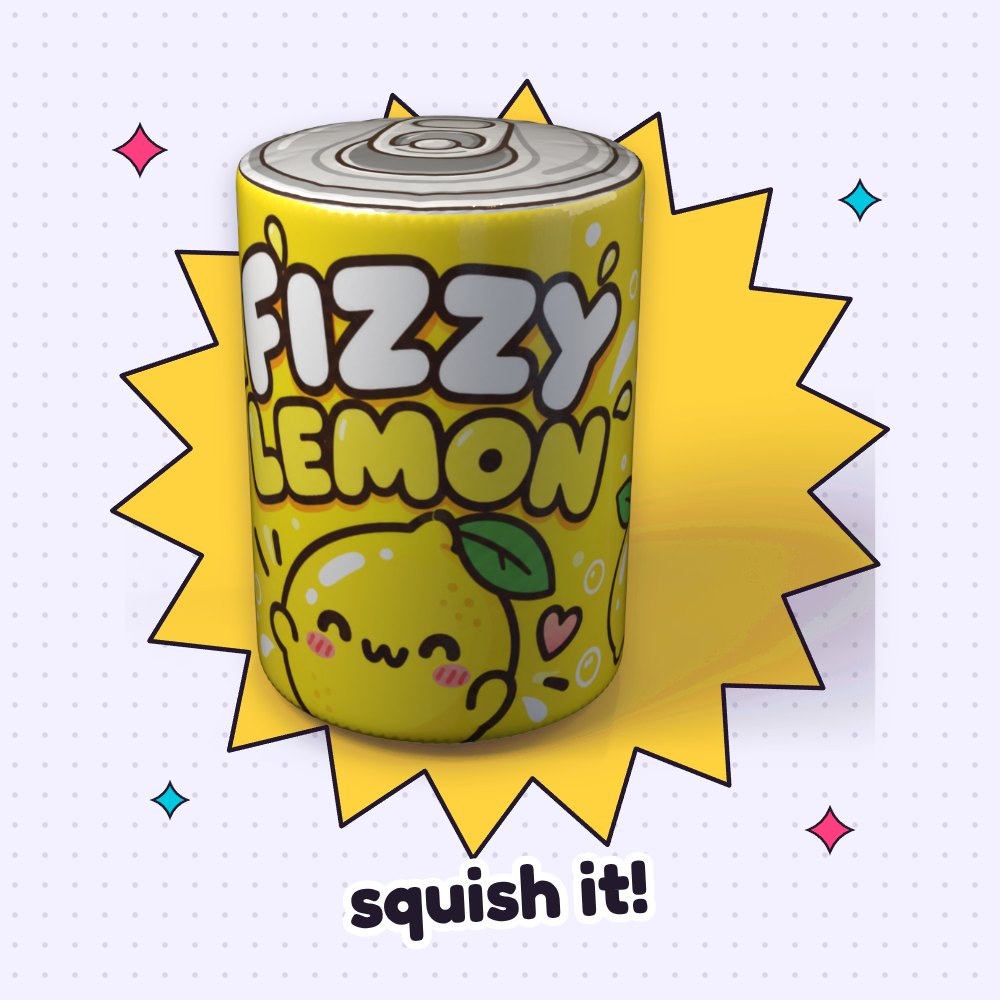
13Squish!
Your 3D Fizzy Lemon soda can is finished and ready to squeeze! Give the yellow cylinder a big squish and watch it puff right back up into shape. If you want a smoother, slow-rising squishy, prick one tiny pinhole into the can.
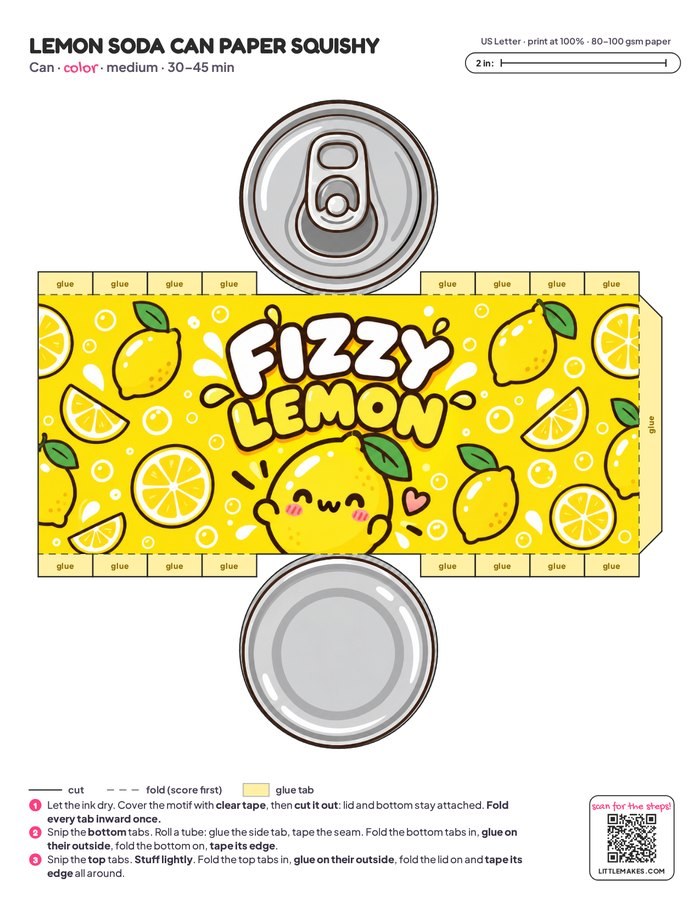
Free Lemon Soda Can Squishy Template
- Color
- Coloring page
- Blank, design your own
- Step-by-step guide
One free PDF: the template in three versions (pages 1–3) and the step-by-step guide (pages 4–7). Print the template at 100% on plain printer paper.
Tips for the perfect squish
- Keep the cylinder rim neat. Score every dashed line along the top and bottom rows of tabs with an empty pen and a ruler before folding. This gives the round silver lids a clean edge to sit on instead of a bumpy rim.
- Stop curved seams from popping. Glue does not hold on packing tape, especially around a curved soda can lid. Whenever a seam lifts up, put a new strip of clear tape along the whole seam.
- Fix a bulging soda can. If the yellow sides puff out instead of standing like a cylinder, there is too much stuffing inside. Take some filling out so the sides of your can stay flat.
- Prevent wrinkles on the wrapper. Use shorter strips of clear tape when laminating the wrapper and sealing the round lids, and lay them on gently without pulling.
Questions
What can you put in a paper squishy soda can?
You can stuff your soda can with plastic grocery bags for a light, crinkly feel, or use polyester fiberfill for a soft, plush bounce. Always stuff the can lightly so the cylinder shape stays neat.
Can I make this drink paper squishy with only glue?
No, glue only holds the yellow tabs in place while you build the can. Because glue does not stick to tape-covered paper for long, every glued seam needs a strip of clear tape from the outside.
What paper works best for this template?
Plain printer paper (80–100 gsm / 20–24 lb) works best for rolling a smooth soda can. Cardstock is hard to fold once covered in packing tape and makes the squishy too stiff.
How can I make a whole paper squishy drinks collection?
Print the blank template version to draw your own flavors, or pair this lemon can with our juice box paper squishy. You can also print the page larger on a bigger sheet of paper to make a jumbo can, since all parts are one piece and always fit together.
Can I make these soda cans with a class or group?
Yes, just print one sheet per person and cut the clear tape strips in advance. Kids can color the Fizzy Lemon coloring page while you help with scoring and taping, and you should plan about 45 minutes.
More paper squishies to make
Pin this tutorial
Save it to your craft board so you can find the free template again.