
- Medium
- 30–45 minutes
- 3D shape
- about 1.8 × 1.8 in (4.5 × 4.5 cm)
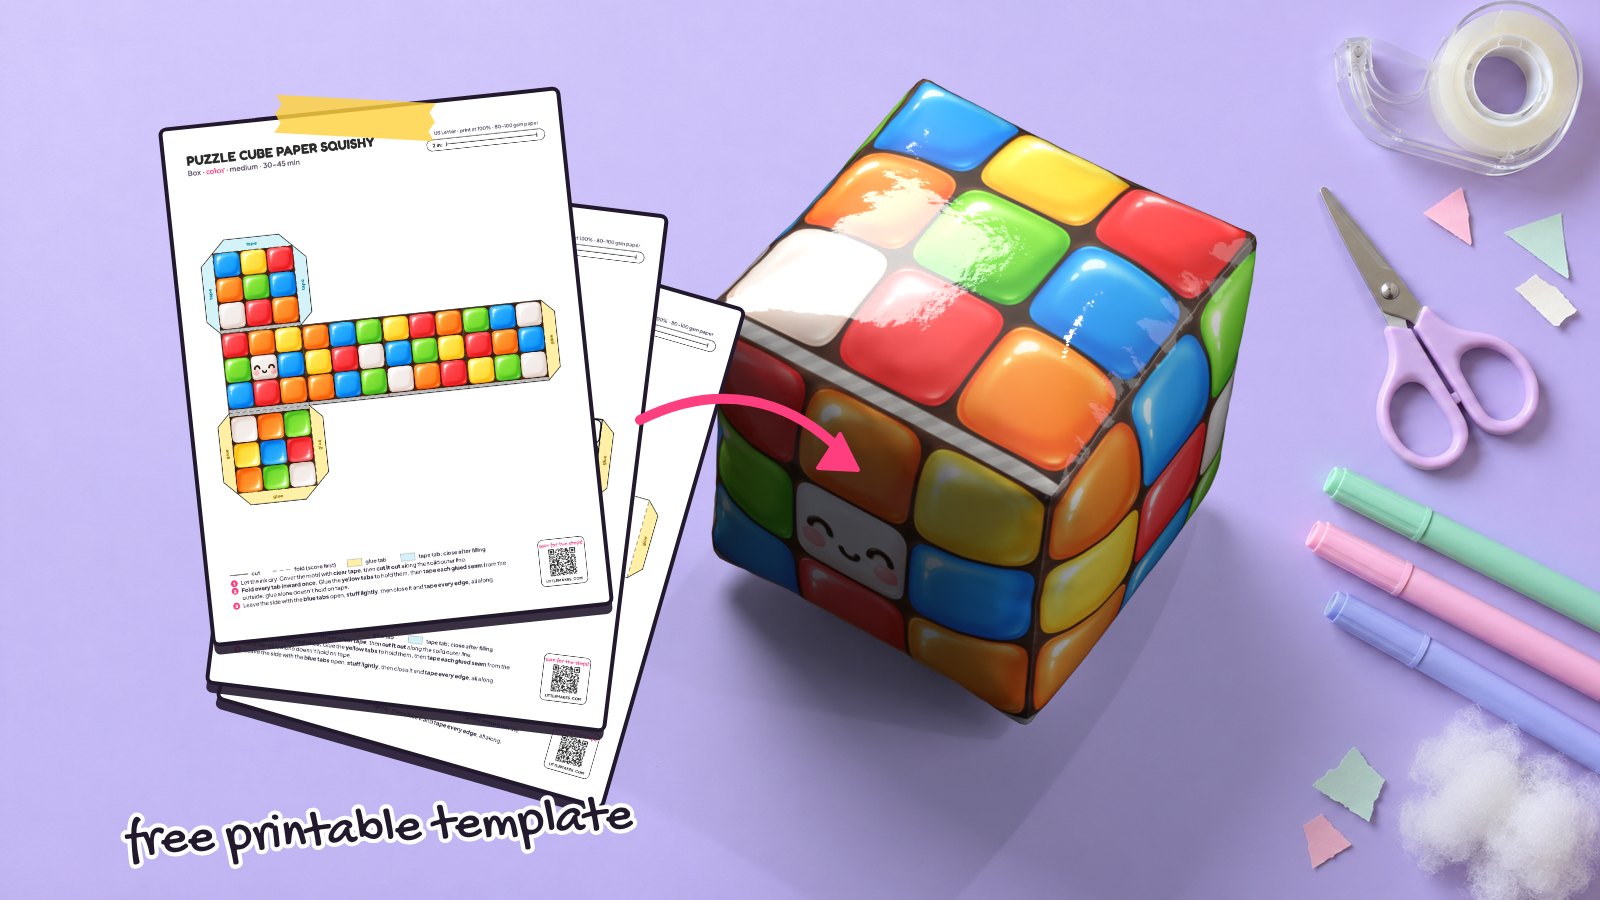
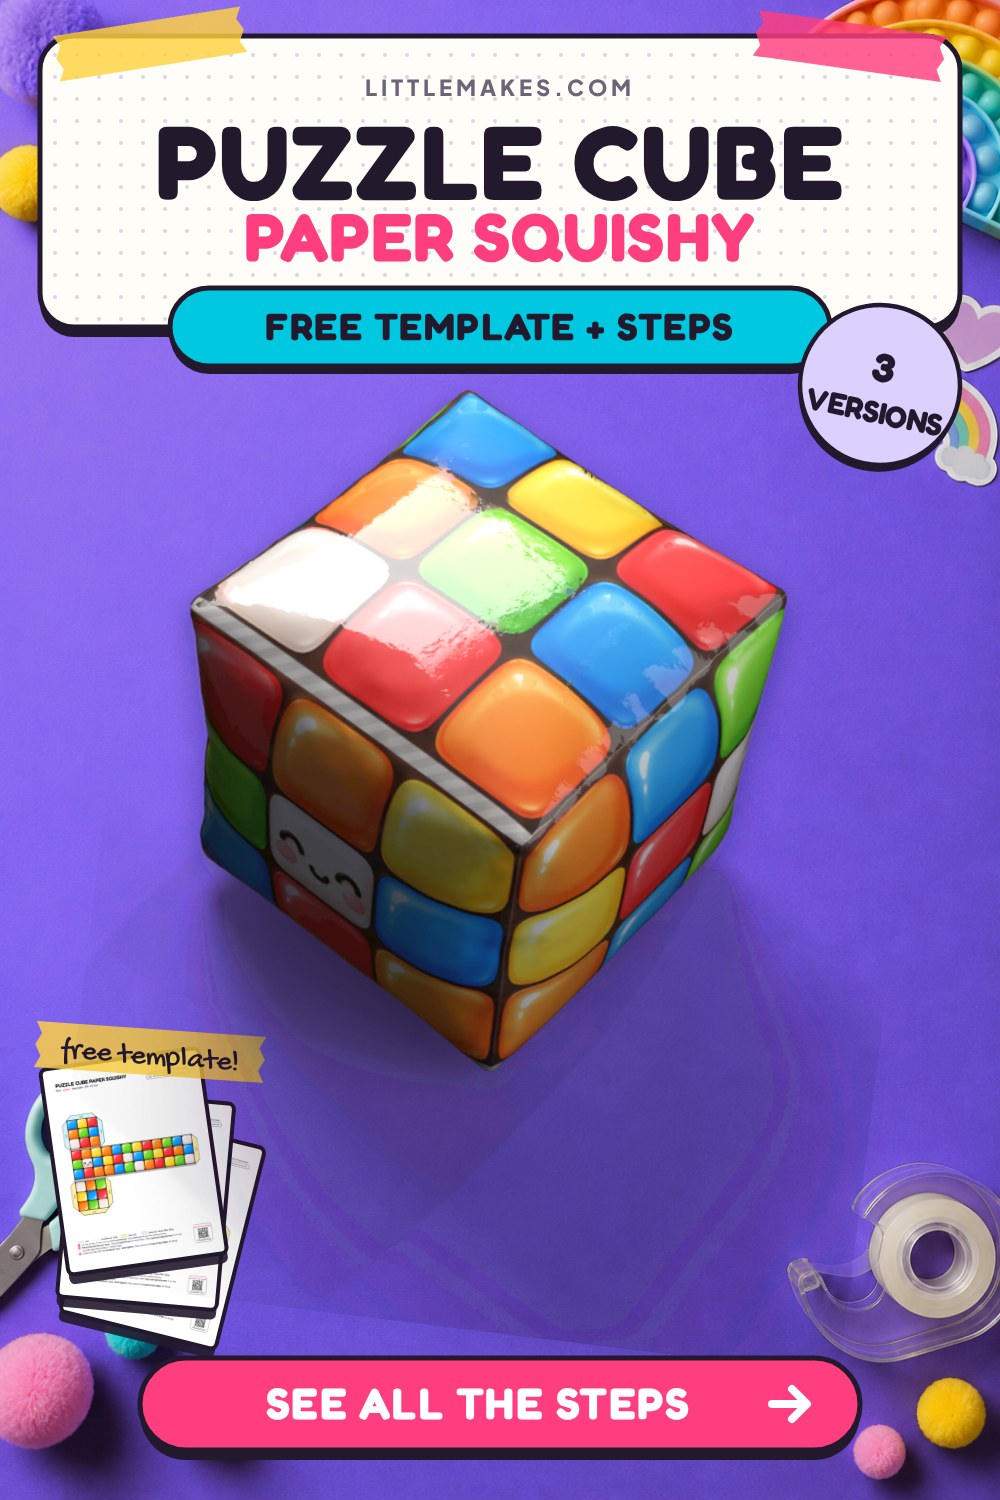
Skip the tricky algorithms and craft a cute puzzle cube that is already a winner! This glossy 3D block features bright red, blue, yellow, green, orange, and white tiles with a happy kawaii face smiling from the middle square. Grab the free printable cube paper squishy template in 3 versions (full color, coloring page, and blank) formatted for both US Letter and A4 paper. Pair it with our dice paper squishy for a fun tabletop game set!
What you need
How to make it, step by step
1Print the template
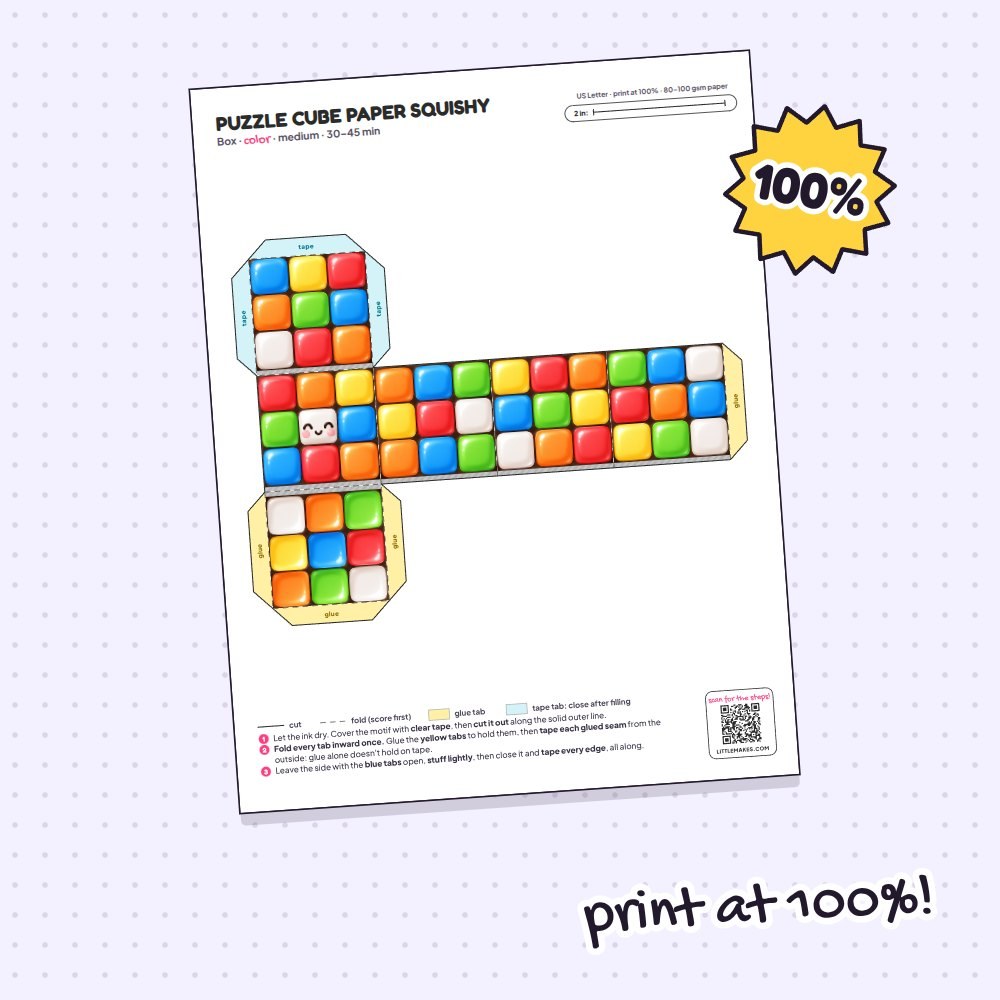
Print your chosen puzzle cube page at 100% scale on plain printer paper (make sure “fit to page” is turned off). Check the scale bar at the top right so it measures exactly 2 inches (50 mm on A4). Picked the coloring page? Color the grid tiles now in classic bright shades or pastel rainbow tones, keeping that center face tile nice and clear.
2Tape the motif
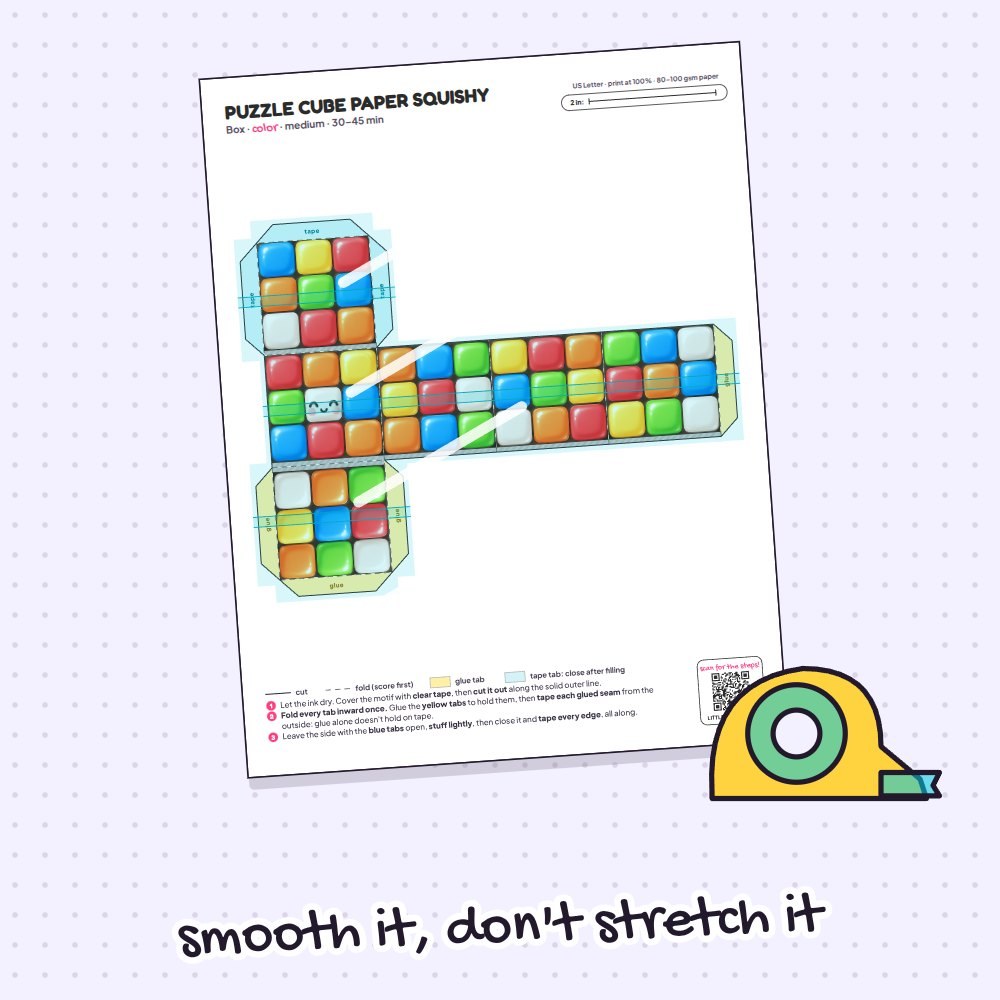
Lay strips of wide clear packing tape across the entire puzzle net, covering all the yellow and blue tabs too. Smooth each strip outward from the center without stretching it. A smooth tape layer gives the colored squares that shiny, plastic-tile look of a real puzzle toy.
3Cut it out
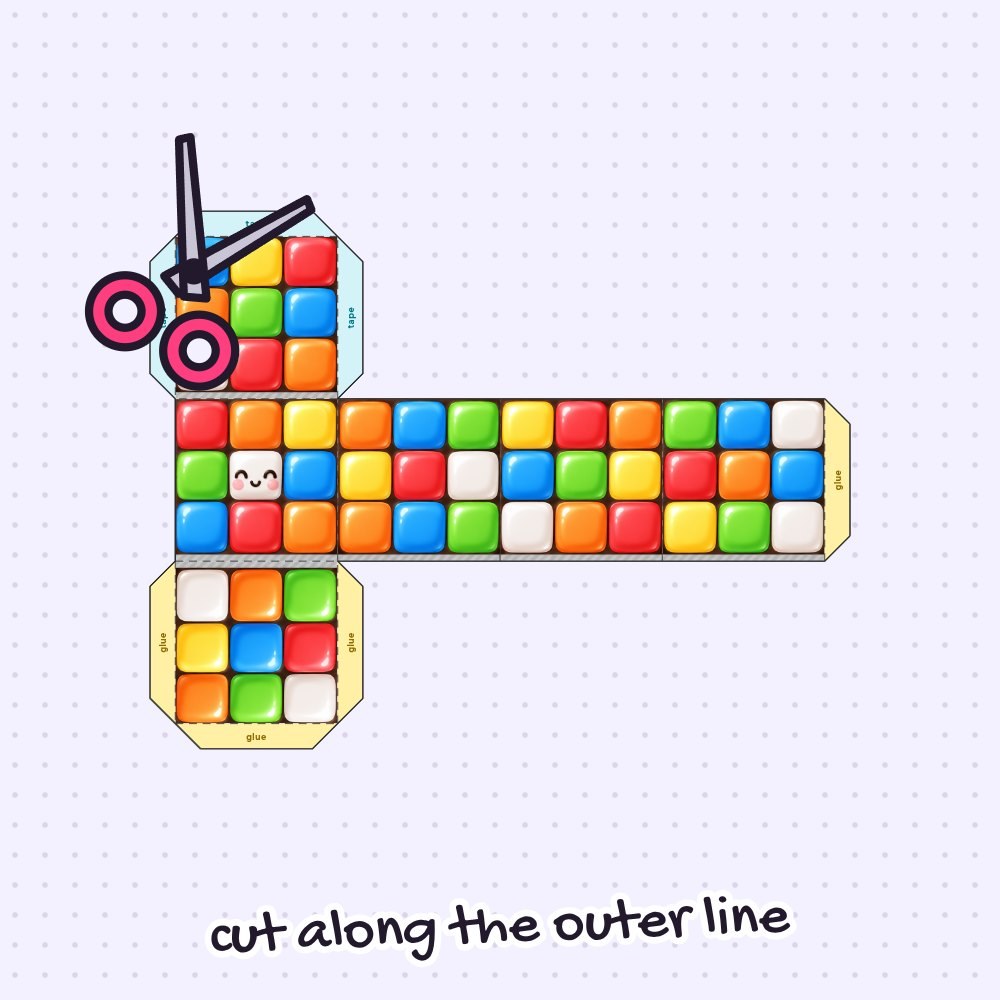
Use your scissors to cut neatly along the solid black outer border, making sure to keep all the yellow and blue tabs attached. Take your time around the angled corners of the tabs, and never cut into the dashed fold lines between the cube faces.
4Pre-fold every tab
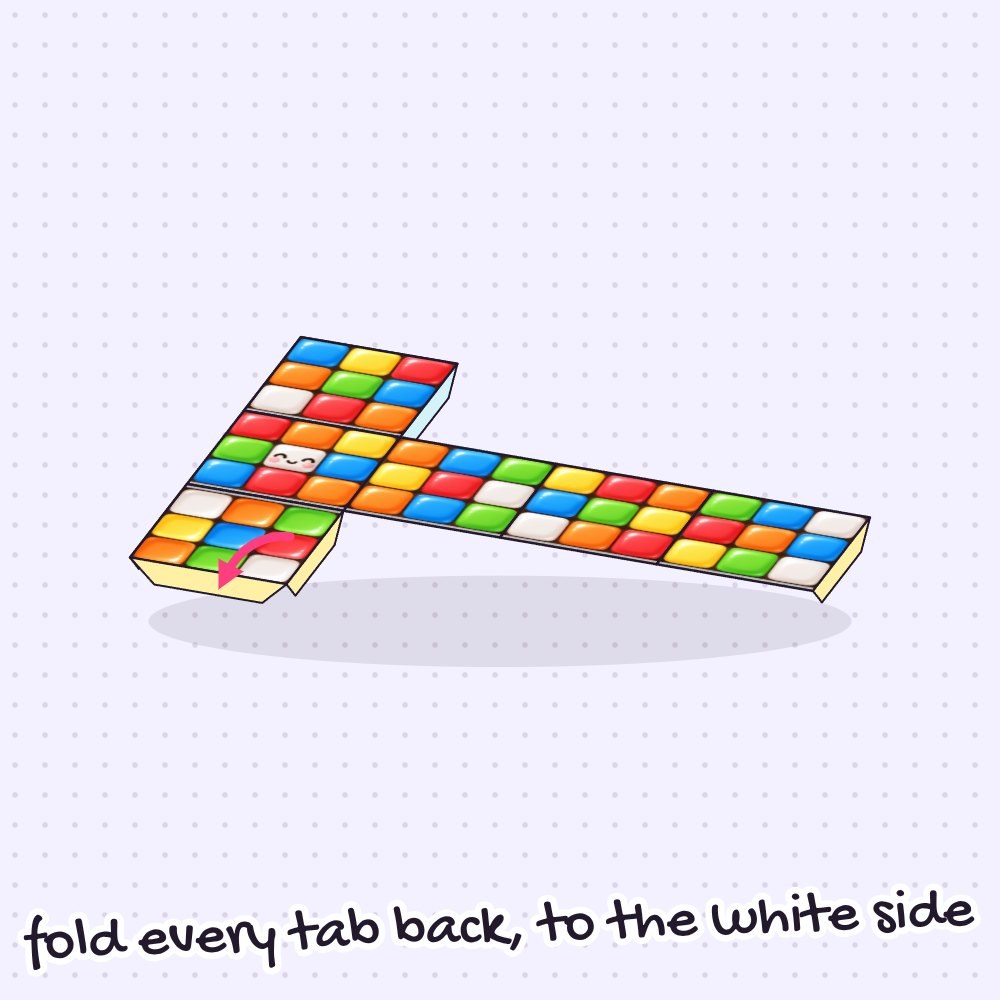
Line up your ruler along every dashed line and score firmly with an empty pen. Fold each tab and each square panel inward toward the blank white back once, then unfold it again. Because taped paper is stiff, pre-creasing now guarantees crisp, sharp corners for your 1.8 × 1.8 in (4.5 × 4.5 cm) block.
5Make the walls
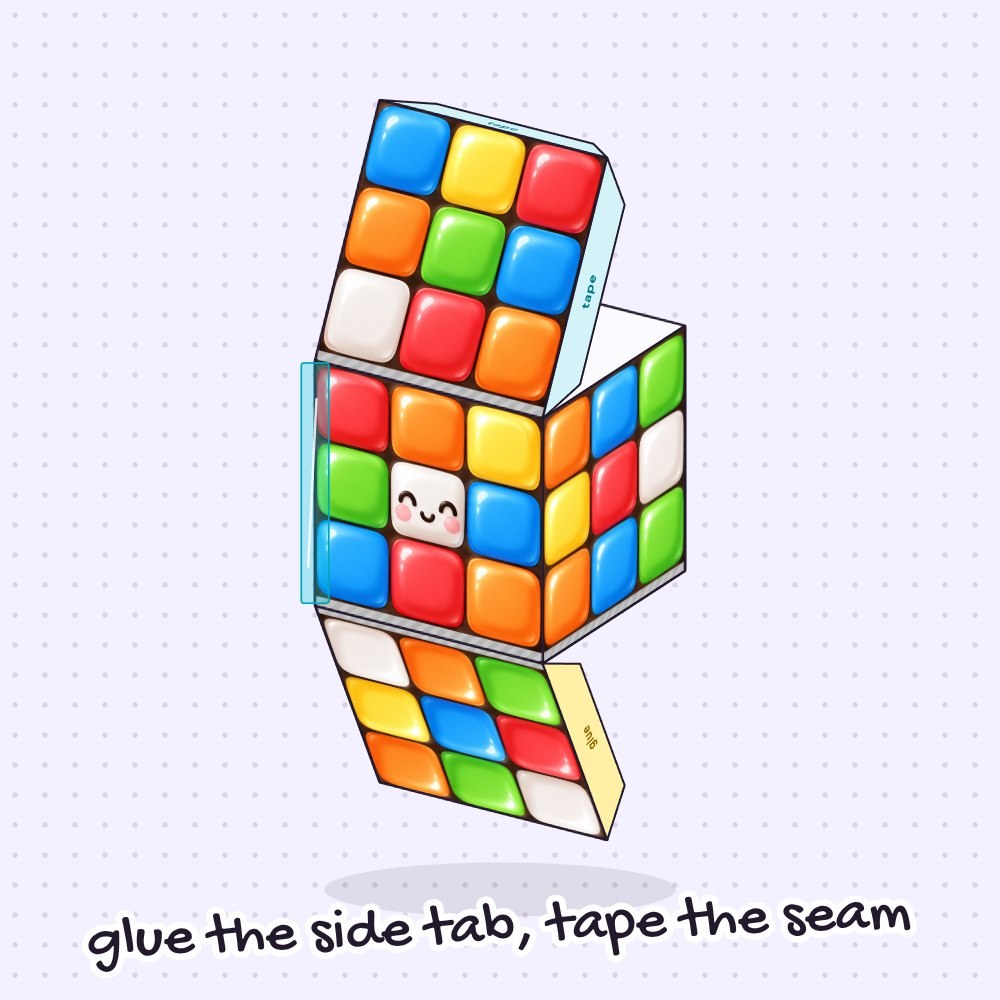
Fold the row of middle squares into a square ring with the colorful tiles facing out. Dab glue onto the yellow side tab, press it inside the opposite wall to hold the ring together, and seal the entire vertical seam from the outside with a strip of regular clear tape.
6Close the bottom
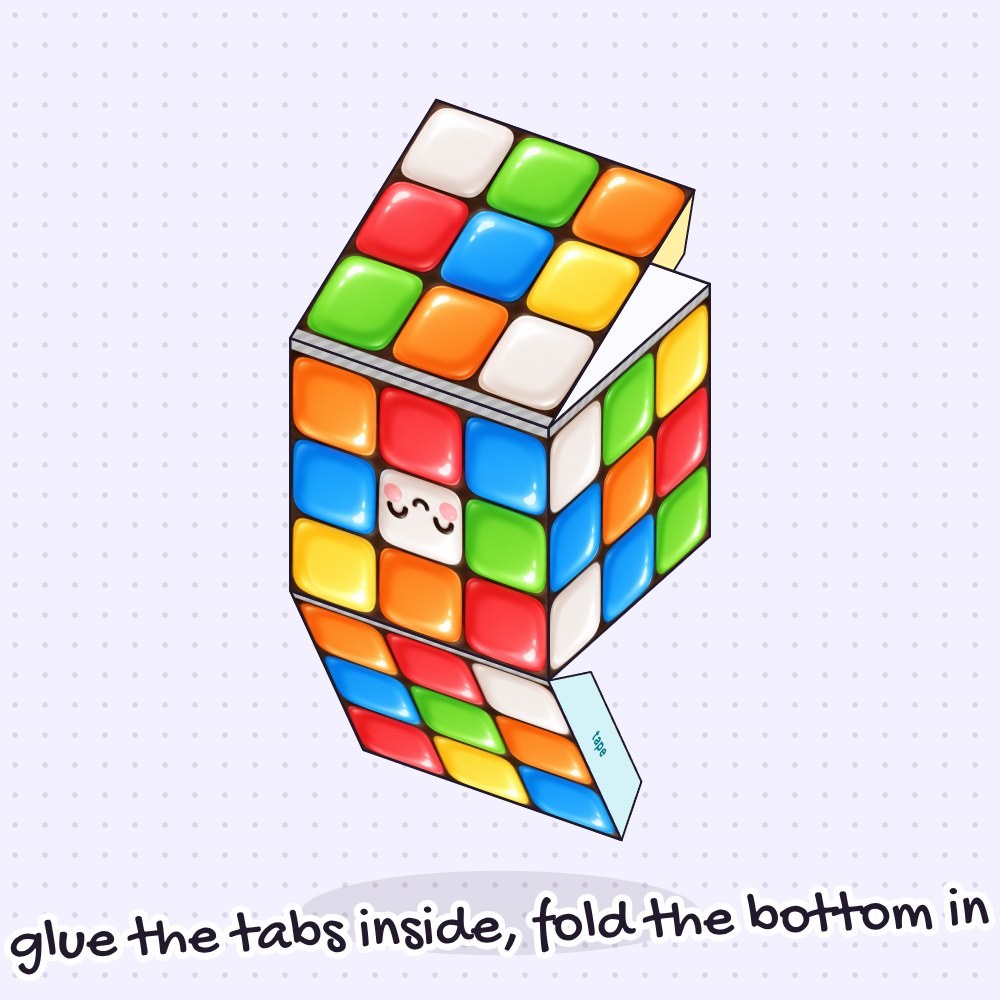
Spread a little glue on the 3 yellow bottom tabs, fold the bottom square flap in, and press the tabs firmly against the inside walls so the dark grid borders line up. Leave the top flap with the blue tabs open so you can fill your cube.
7Tape the bottom
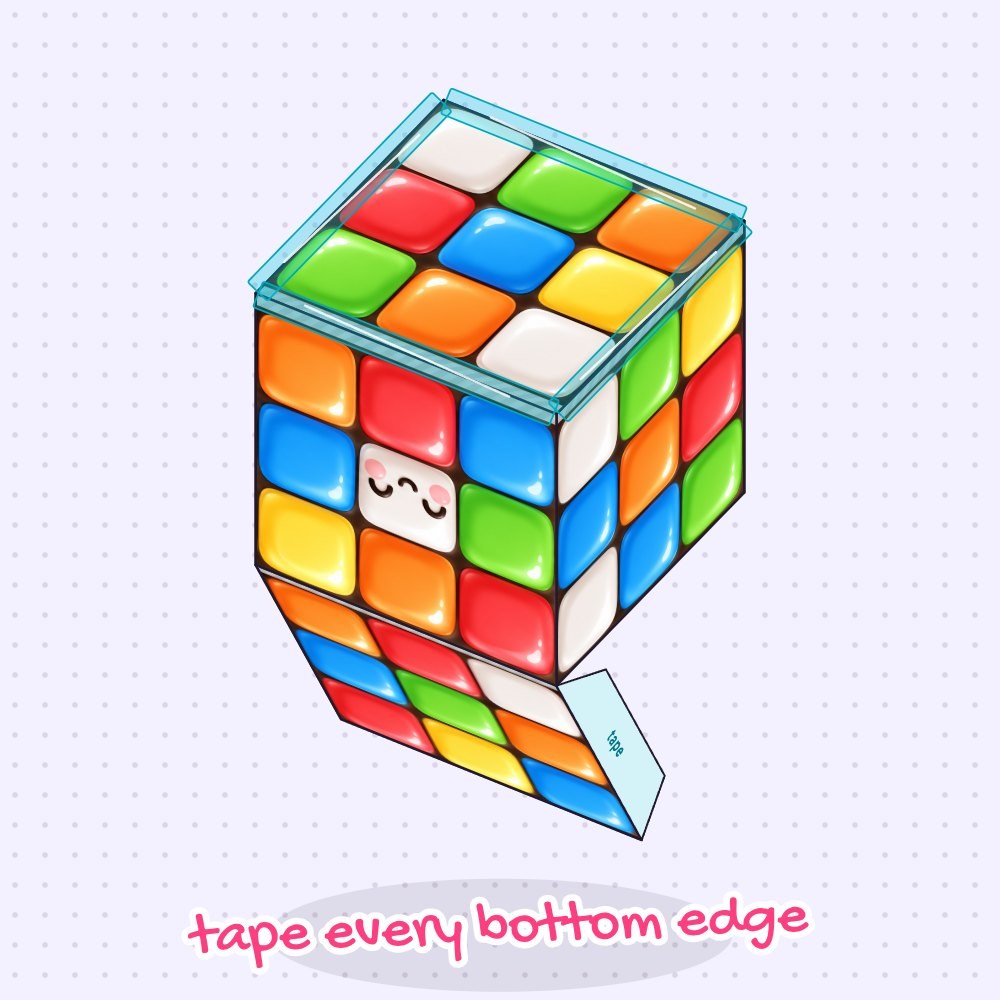
Glue only holds the tabs in place temporarily and will not stick to the slick tape surface for long. Reinforce every bottom edge from the outside with regular clear tape, running each strip along the full length of the seam.
8Stuff it
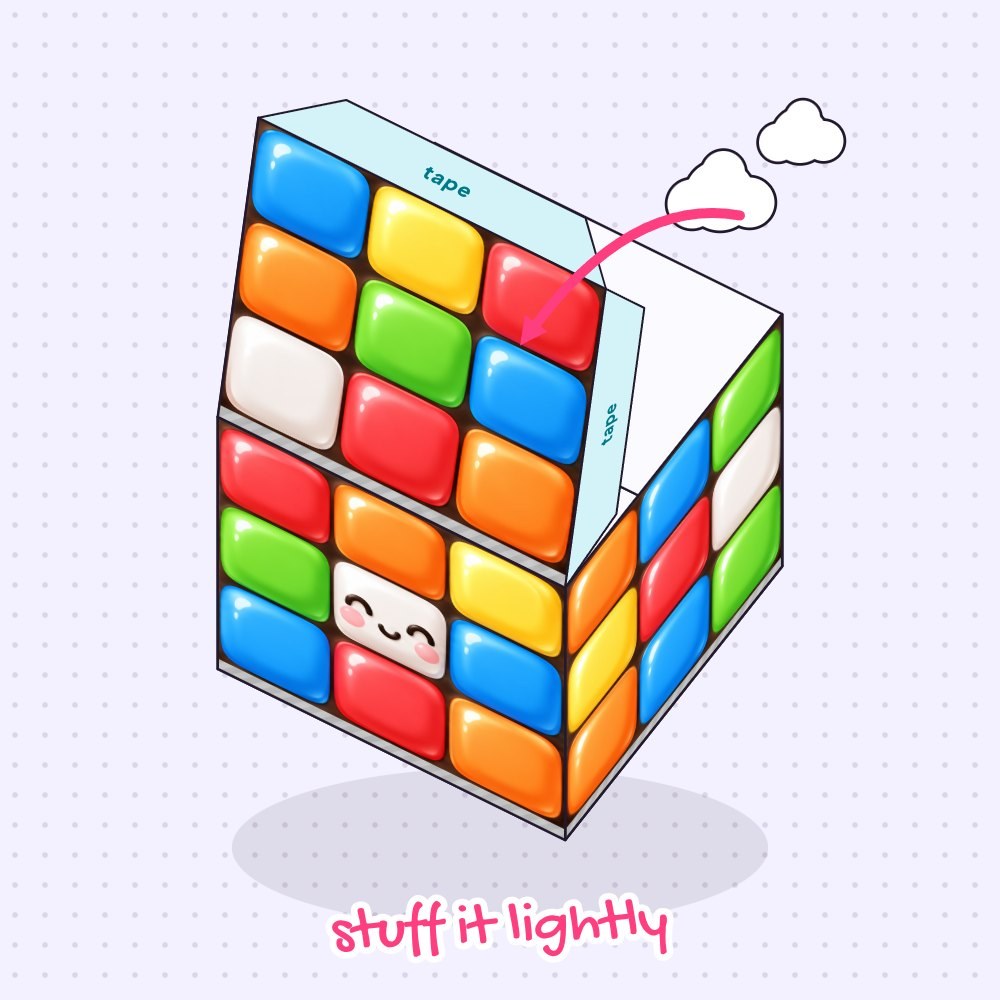
Push small, loose scrunches of plastic bag or tiny tufts of fiberfill in through the open top. Gently nudge the filling into the bottom corners first, and keep the stuffing light and airy so the square faces stay flat like a real puzzle block.
9Close it
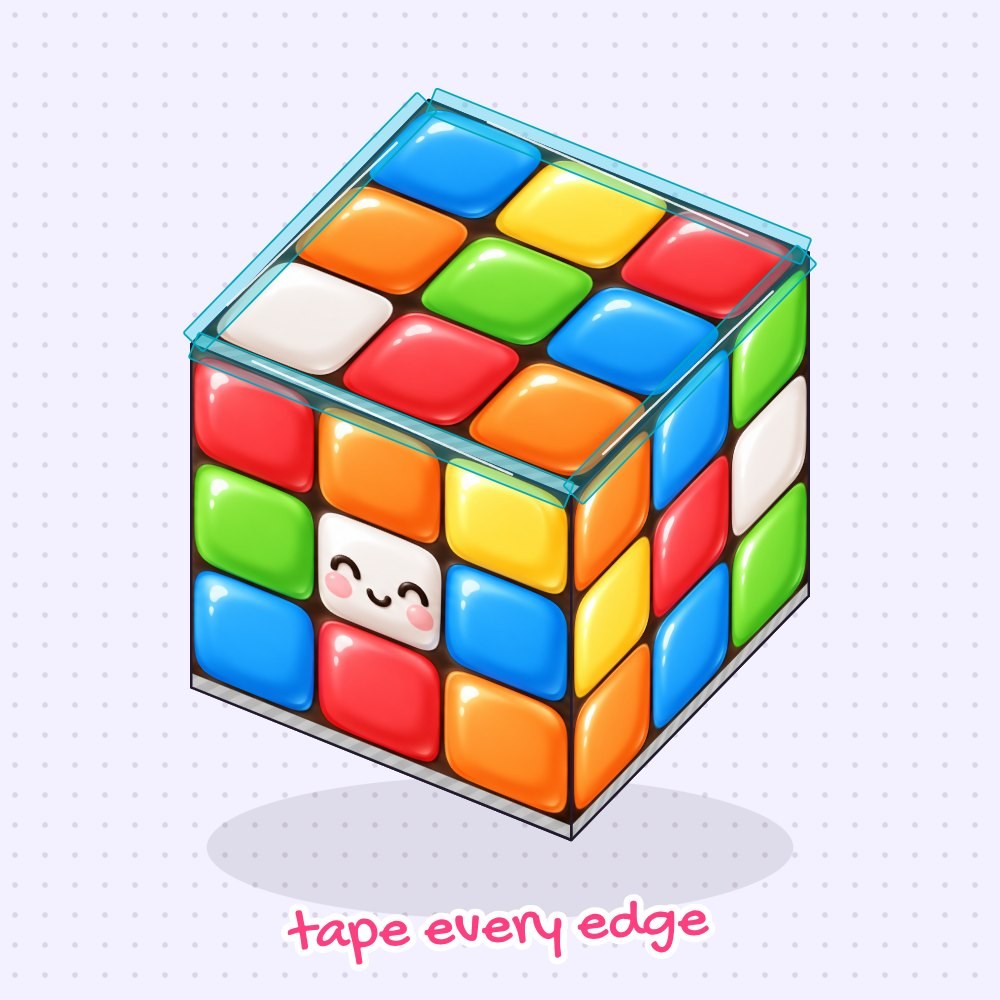
Fold the 3 blue tabs inward and pull the top lid down over them to close the box. Hold the lid steady and tape every top edge from the outside with regular clear tape, sealing all along each seam so no air or stuffing escapes.
10Squish!
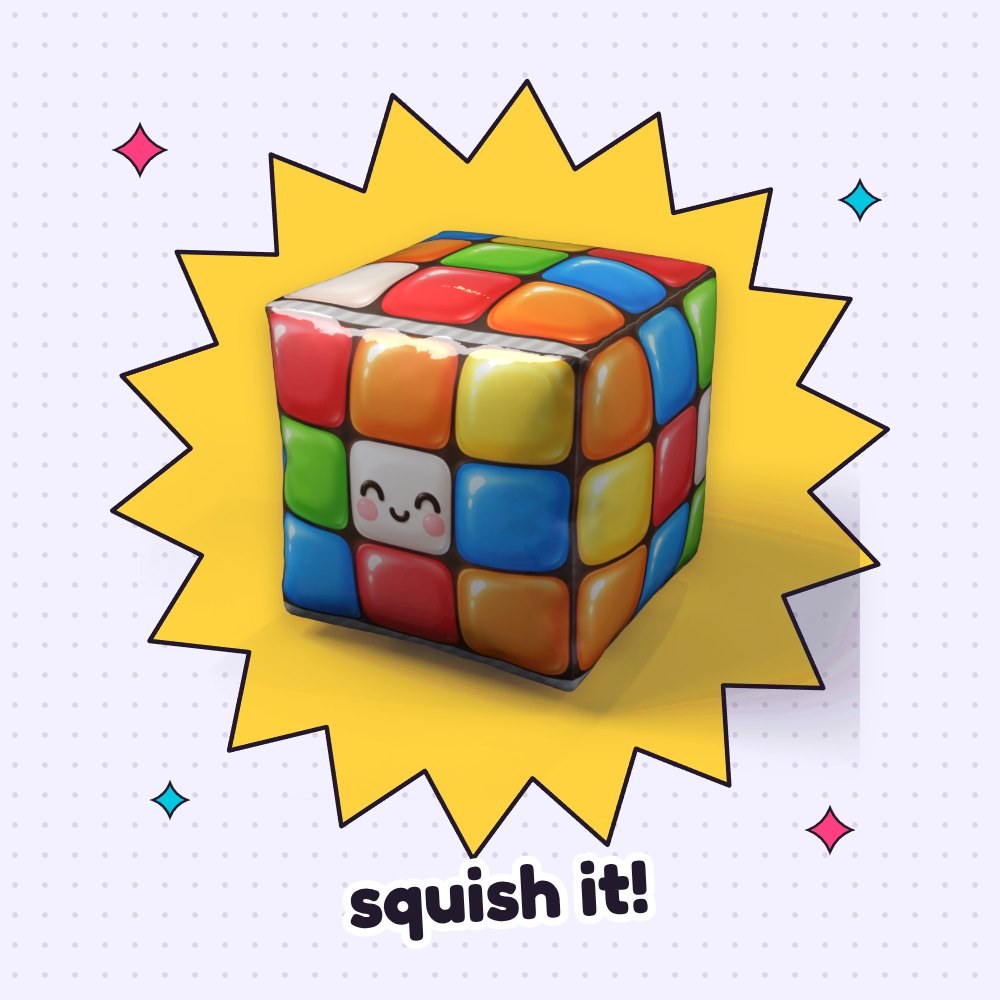
Your kawaii puzzle cube is ready! Give the 1.8 × 1.8 in (4.5 × 4.5 cm) block a big squeeze and watch the colorful tiles puff right back into shape. If you want a slower rise, prick one tiny pinhole into a dark grid line.
Free Puzzle Cube Squishy Template
- Color
- Coloring page
- Blank, design your own
- Step-by-step guide
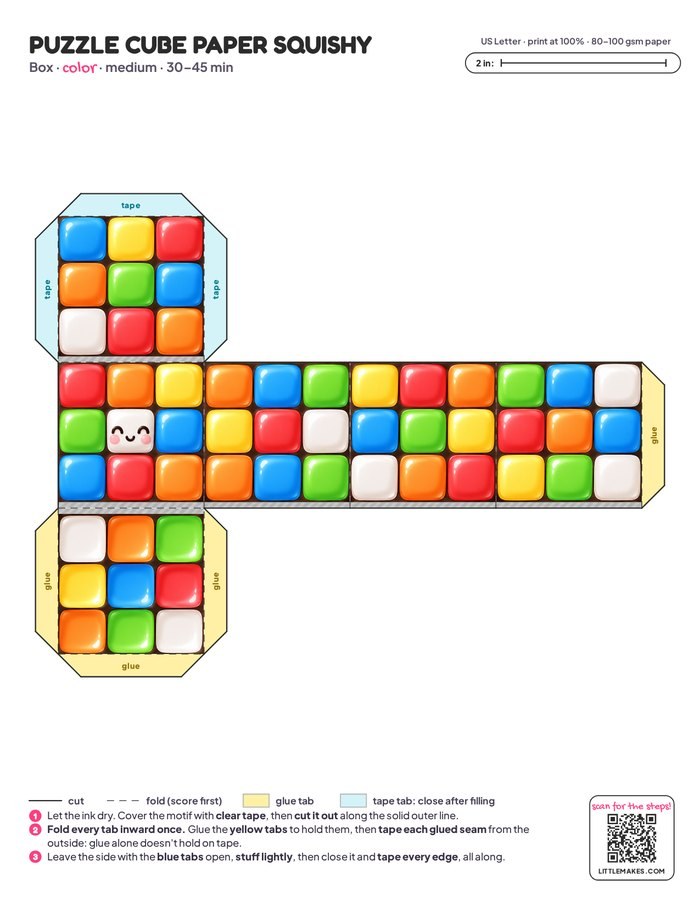
One free PDF: the template in three versions (pages 1–3) and the step-by-step guide (pages 4–6). Print the template at 100% on plain printer paper.
Tips for the perfect squish
- Grid lines don’t line up. Score directly on the dashed lines using a ruler and an empty pen before folding. Sharp creases keep the side panels aligned so the dark grid borders match at every corner.
- A corner seam pops open. Craft glue cannot hold onto laminated paper on its own. Press the square edge closed and seal the entire seam from the outside with a fresh strip of clear tape.
- Cube looks round like a ball. Overstuffing pushes the flat square panels outward. Pull out a bit of filling before taping the lid so your puzzle cube keeps its boxy 3D shape.
- Wrinkles across the cute face. Cut shorter pieces of packing tape and lay them gently across the middle squares without pulling. Smoothing from the center outward keeps the smiling white tile crystal clear.
Questions
How do you make a paper squishy fidget cube last without popping open?
Glue is only used to tack the yellow tabs in place while you assemble the box. Because glue does not stay stuck to tape-covered paper, sealing every seam from the outside with regular clear tape is what makes your fidget toy sturdy.
What paper works best for a paper squishy cube?
Standard printer paper (80–100 gsm / 20–24 lb) is ideal. Heavy cardstock becomes too stiff once covered in packing tape and won’t squish softly in your hand.
What can I stuff my cube paper squishy with?
Plastic grocery bags give a fun, crinkly bounce, while polyester fiberfill creates a plush, pillowy feel. Whichever you choose, stuff the box lightly so the sides stay flat and square.
Can I make a giant puzzle cube or pair it with other fidgets?
Yes! Print the template at a larger scale on bigger paper—since the whole net is one piece, all the tabs will still match up. You can also craft a matching squish cube squishy to build a whole DIY fidget collection.
Can I make these with a classroom or party group?
Definitely! Print one sheet per kid and pre-cut strips of clear tape before starting. Kids can color the coloring page while an adult helps with scoring and taping—plan about 45 minutes total.
More paper squishies to make
Pin this tutorial
Save it to your craft board so you can find the free template again.